Building with doc2.live
This tutorial will show you how to start a doc2.live project.
Prerequisites:
- You have gone through the Getting started tutorial and successfully created a project with a subdomain.
- You have basic web developer knowledge.
- You have a GitHub account, and understand Git basics.
- You have Node and npm installed for local development.
- You have a Cloudflare account.
This tutorial is designed for use with macOS, Chrome, and IntelliJ as the development environment. The screenshots and instructions provided are based on this setup. If you choose to use a different operating system, web browser, or code editor, please be aware that the user interface and required steps may differ accordingly.
Getting started#
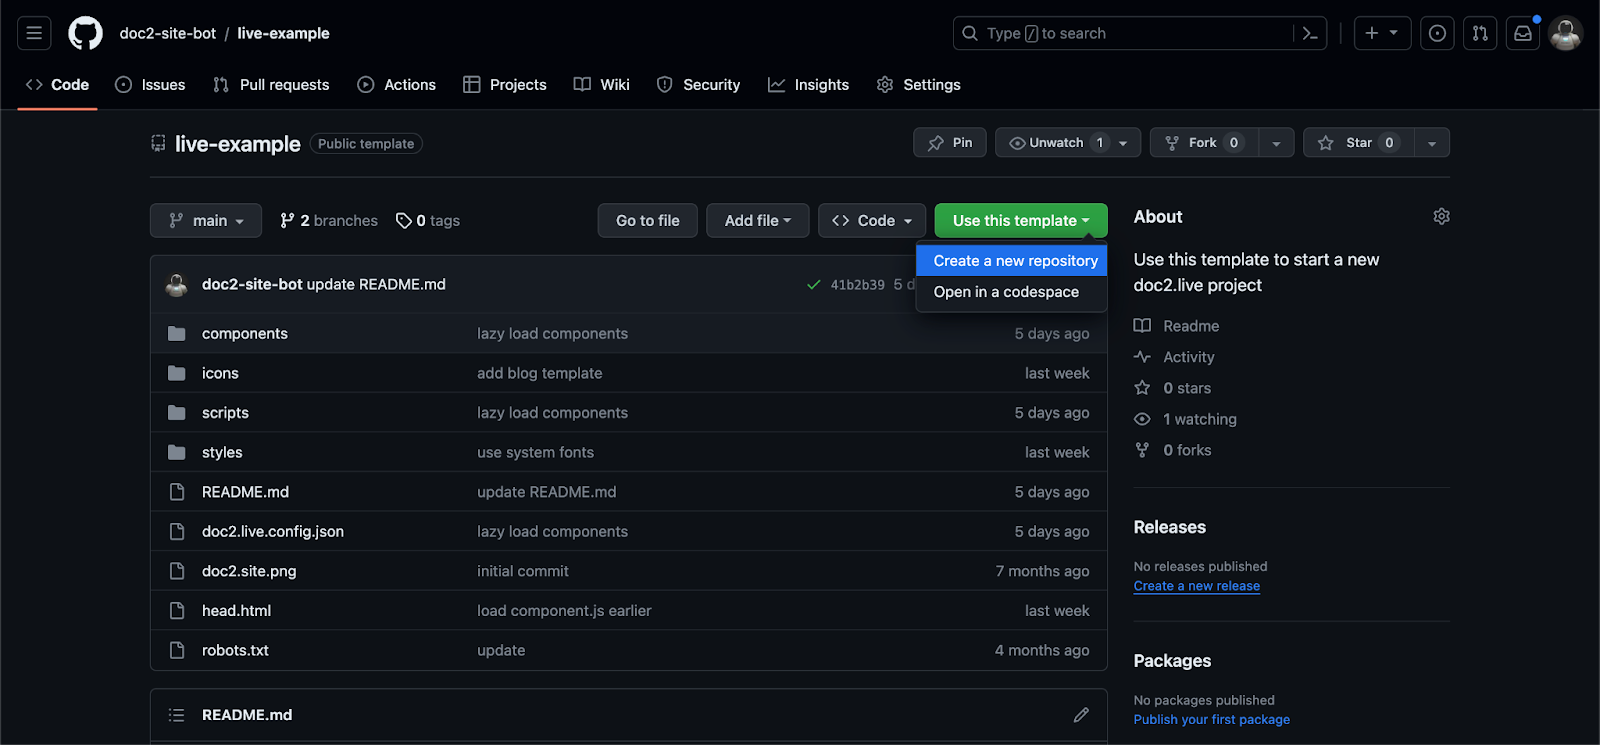
The fastest way to get started is to use the GitHub demo repository as a template which shows how landing pages and blog-like pages can be created and rendered with the doc2.live service.
CLI#
Next, install the doc2 Command Line Interface (CLI) with npm i -g @doc2/cli and clone your repo locally. Then run the doc2.live development server within the root of the project with doc2 live --dev.
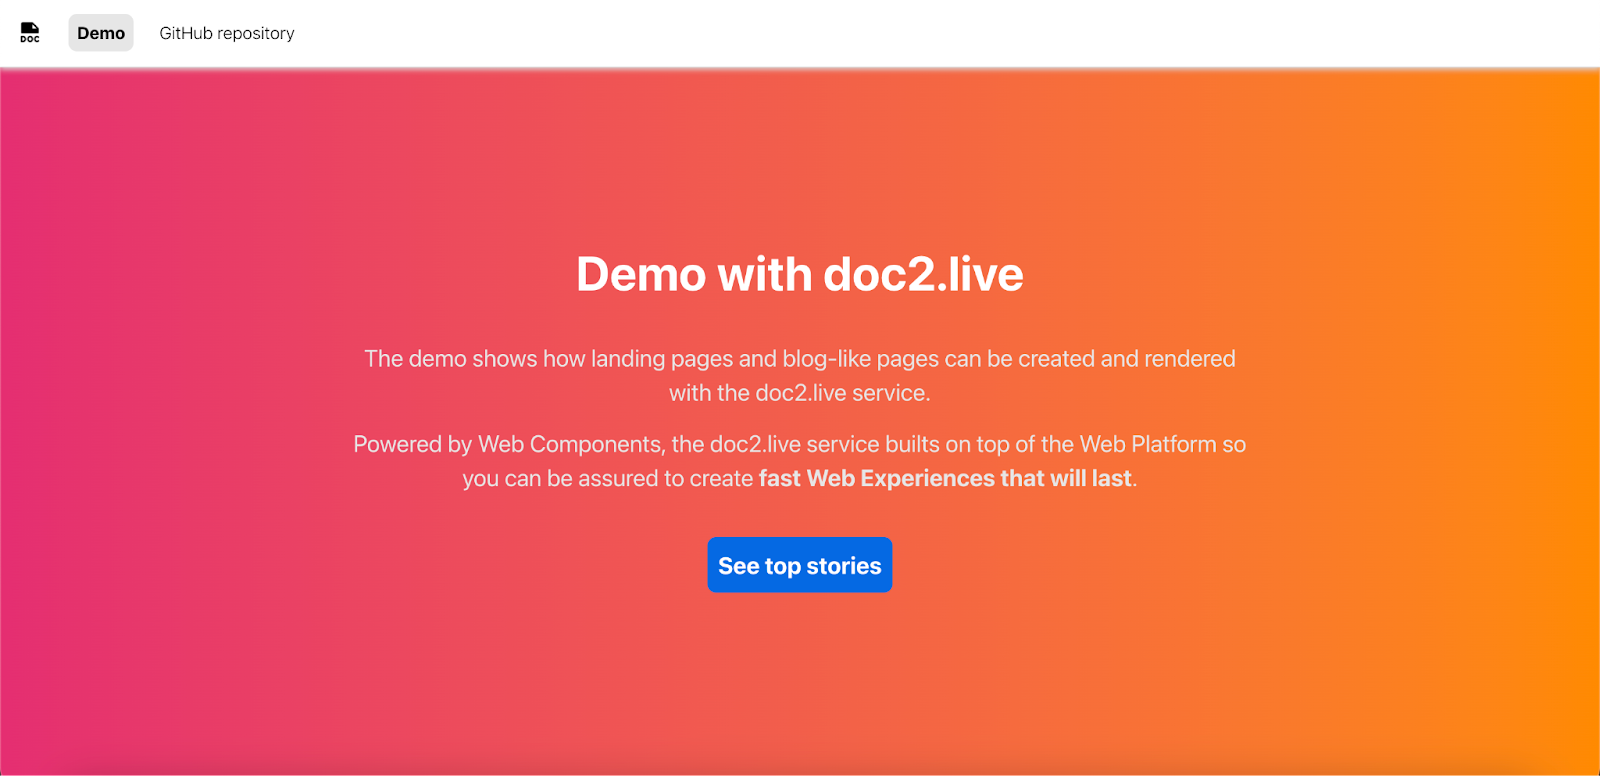
This starts the server at http://localhost:3000. Finally, open the existing demo example in your browser at http://localhost:3000. The server can be stopped with cmd+c or ctrl+c. Currently, the content is coming from the demo subdomain project.
Repository configuration#
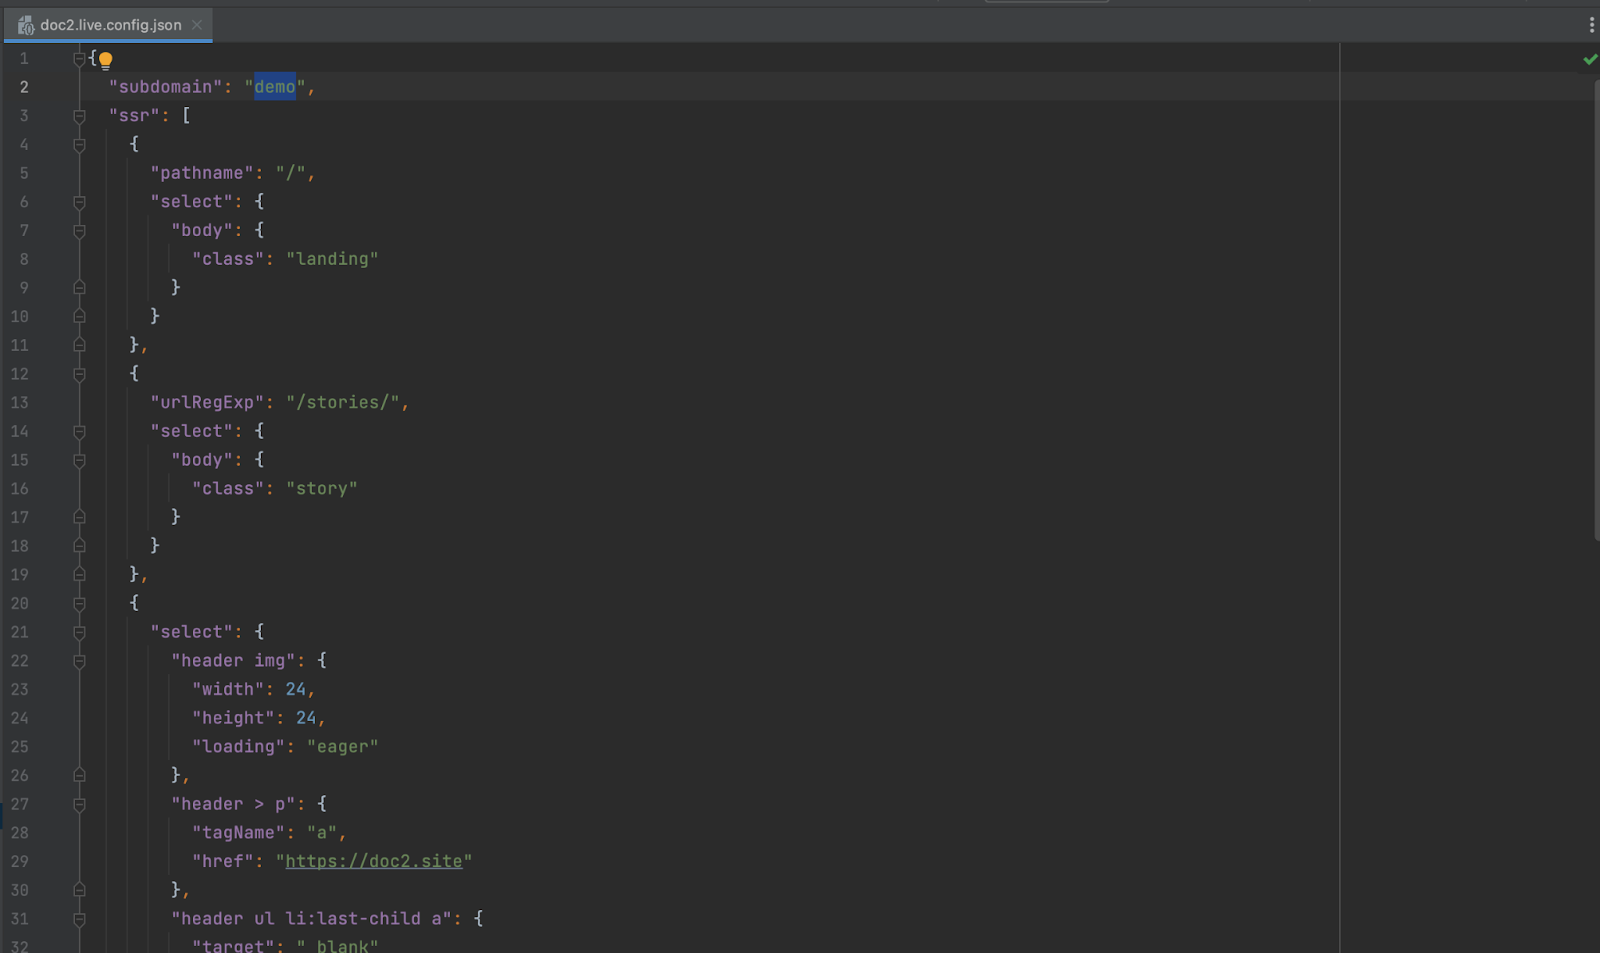
To use your own subdomain, open the repository, open the doc2.live.config.json file and update the subdomain property with the subdomain of your doc2.live project for development. At this point, when you run the development server, the content will be proxied from your project subdomain https://dev–MY_SUBDOMAIN.doc2.live which is currently empty.
Bring your own CDN#
Let’s add some content and to simplify the process, we can simply copy it from the project Google Drive folder at https://drive.google.com/drive/folders/1n98BBrnbQW3Dzgq0Go6tyJOgk2l95Ee_. Copy the doc2.live.config and all documents by keeping the folder structure from the drive folder into your own doc2.site project drive folder.
Next we’ll link the theme to our GitHub Repository but we need to deploy our repository first. For that, we’ll use Cloudflare Pages to serve the static files. Go to your Cloudflare dashboard under Workers & Pages and create a new Pages application:
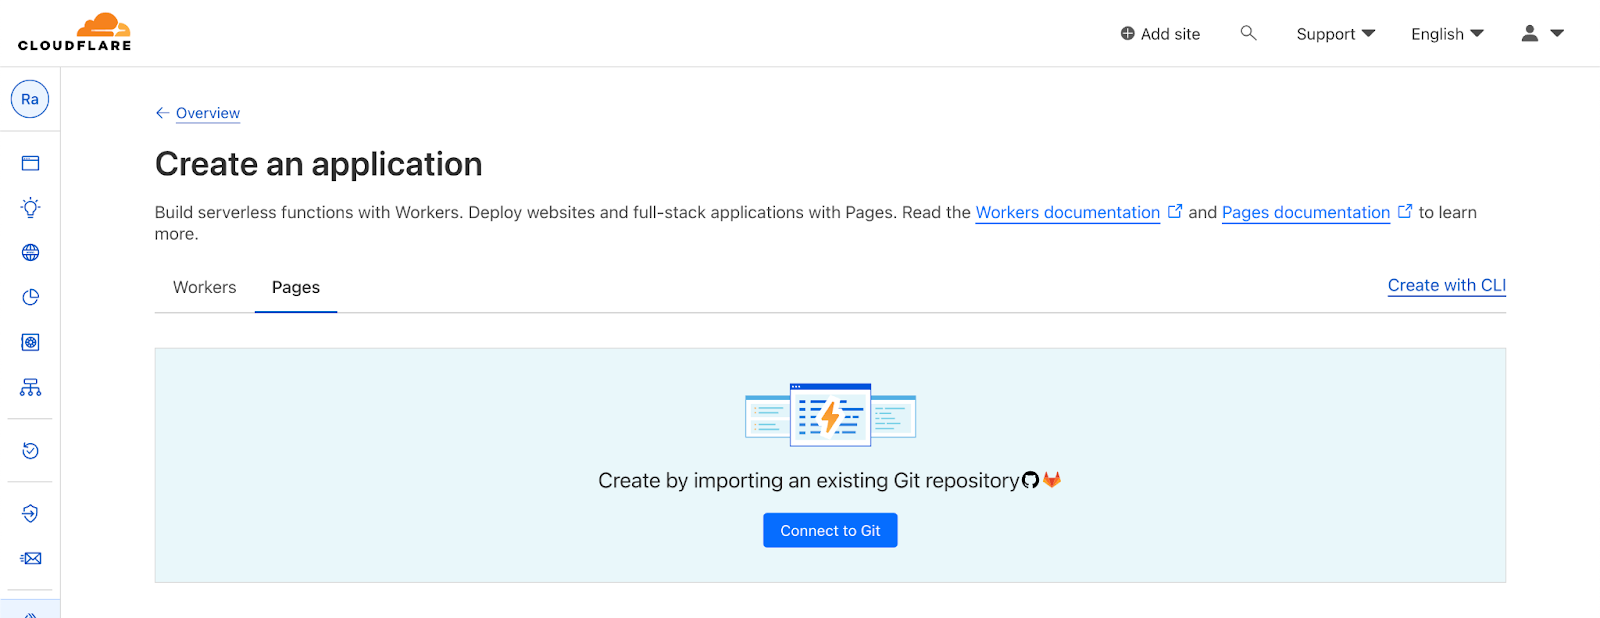
Connect your GitHub repository:
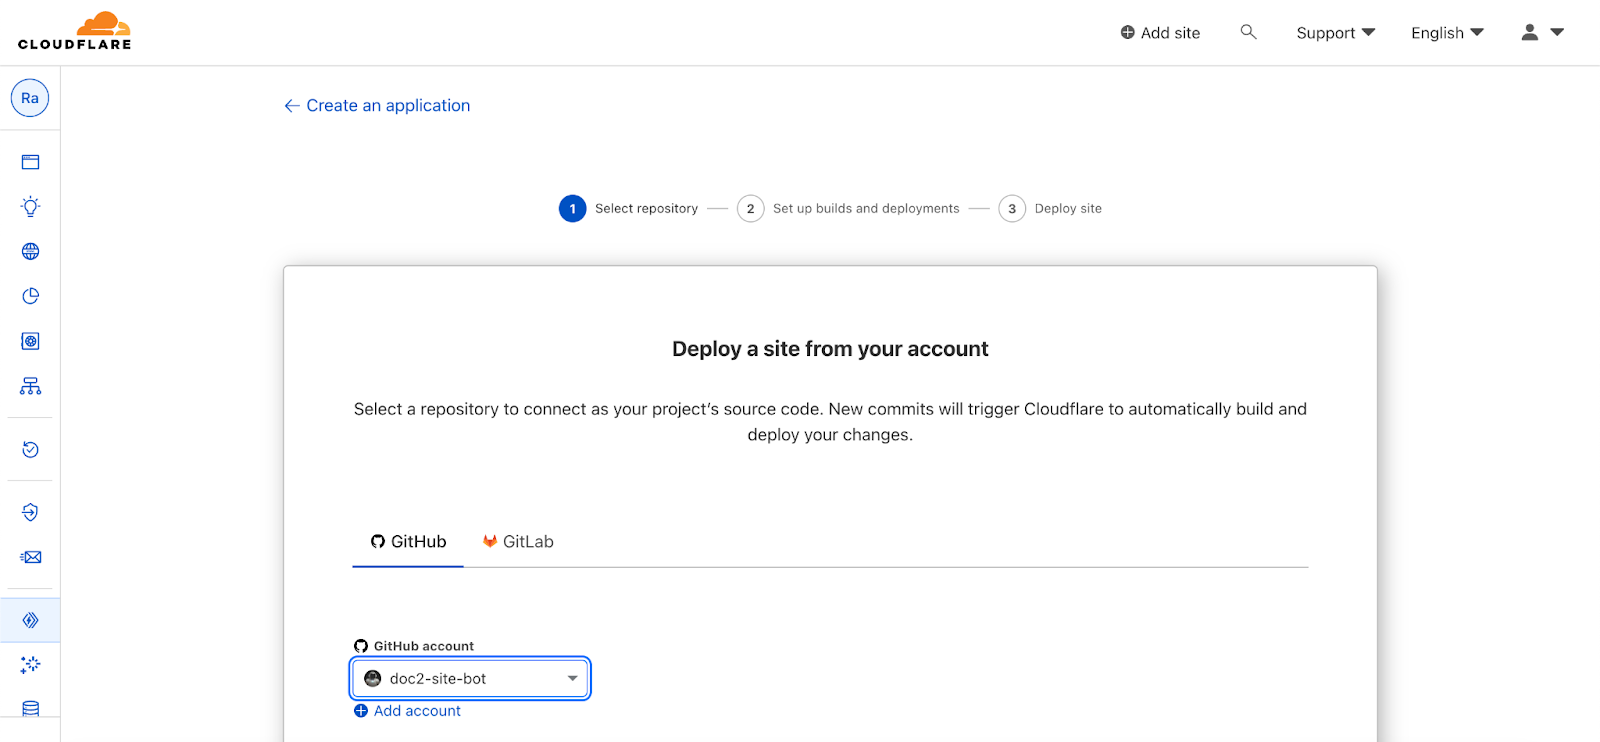
There’s no build setup required so you can just use the default deployment configuration and deploy your repository. It will then be available under PROJECT.pages.dev , with PROJECT being the name of the GitHub repository by default. A new deployment is triggered anytime a commit is pushed to the GitHub repository.
Next, open your doc2.live.config spreadsheet in your drive folder and update the preview to point to your Cloudflare Pages root location. Then click the doc2.site tooling Extension to publish the sheet in the Preview workspaces and then in the Live workspace. Please note that the configuration is tied to the workspace it was published to. Finally, preview all documents.
Congratulations, you can now visit the GitHub example on your own subdomain at https://preview--MY_SUBDOMAIN.doc2.live. If you have published the content on the Live workspace as well, you can visit the Live site at https://MY_SUBDOMAIN.doc2.live.
Custom preview theme#
Cloudflare Pages supports preview deployments by default.

With Cloudflare Pages, every branch will be made available as a preview URL if configured as such. To configure your doc2.live project to support custom previews, you will have to update the doc2.live.config theme sheet. Simply rename the location of the preview to point to the Cloudflare Pages project location and prefix the location with a wildcard asterisk * for example https://*.PROJECT.pages.dev.
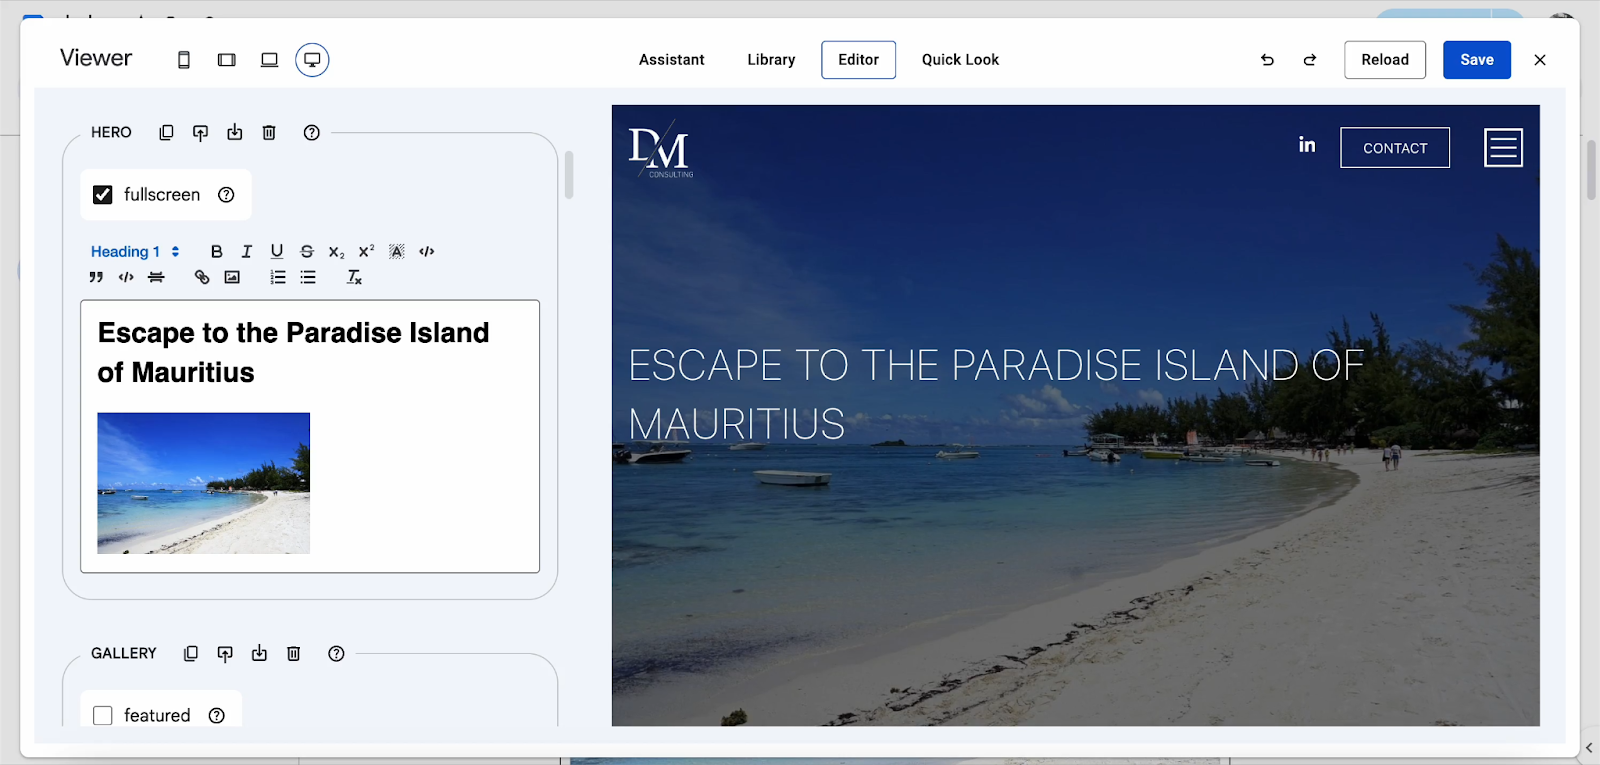
Now that your doc2.live project is correctly configured, you can make changes to the documents and preview them again to see the reflected changes. Similar to the content, you can make code changes to update the look and feel. For that let’s have a closer look at how the doc2.live project is structured.
Head.html#
The head.html file serves as an entry point for loading common JavaScript and CSS files. It is injected as is server side within the <head> HTML tag of the page and blends with the metadata provided by the content.
In the template, it preloads https://api.doc2.site because images are served from the doc2.site Image API. It also loads a common JS script file and component file which will be used as the baseline of the web components.
<link rel="preconnect" href="https://api.doc2.site">

<link rel="stylesheet" href="/styles/styles.css">

<script src="/scripts/scripts.js" type="module"></script>

<script src="/scripts/component.js" type="module"></script>

<link rel="icon" type="image/png" href="/doc2.site.png" />
Header and Footer#
By default, doc2.live returns the published content wrapped inside a <main> element inside the <body>. A <header> and <footer> are also injected next to the <main> element:
<!DOCTYPE html>
<html lang="en" dir="ltr">
 <head></head>
 <body>
   <header></header>
   <main></main>
   <footer></footer>
 </body>
</html>
The header and footer source is looked up by default at the following path /fragments/header and /fragments/footer and injected in the HTML response.
A custom header and footer can be specified via the meta component with the value header or footer corresponding to the header or footer document location.
Page Template#
The main content can be wrapped inside a custom component if required which allows nesting of components. Usually this is helpful to build custom reusable layouts. To create a page Template, add a template property to the meta component in the document for example:
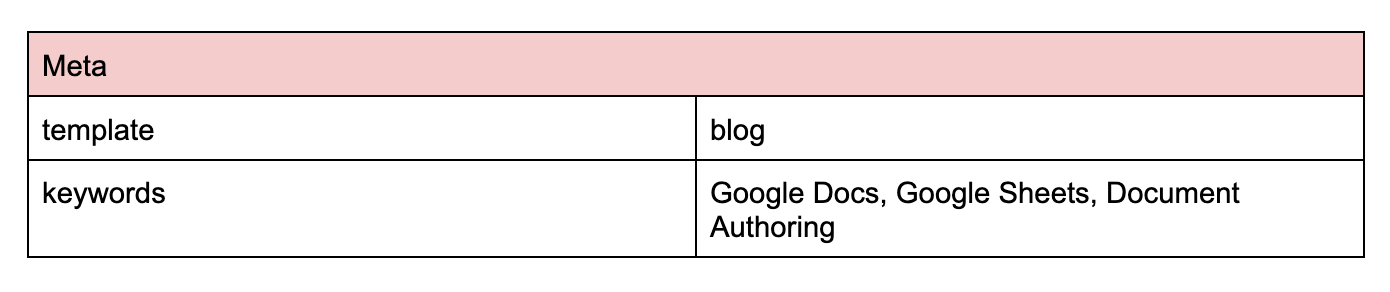
In this example, the blog component will wrap the main content as follows:
<!DOCTYPE html>
<html lang="en" dir="ltr">
 <head></head>
 <body>
   <header></header>
   <main>
     <web-blog>
     </web-blog>
   </main>
   <footer></footer>
 </body>
</html>
Fragment document reference#
The header and footer fragments are the only fragments that are resolved by default in the HTML response.
Optionally, other document fragments can be added to the document to be resolved and injected in the HTML. Use the fragment component with the reference property to include document fragments in a page as the following example:

We recommend storing all document fragments in a dedicated fragments folder at the root of the project.
Please note that nested fragments are only resolved up to 1 level.
Optimized Images#
Published images are rendered using the picture element with multiple sources to support different screen sizes and image formats. This helps to provide users with the best image without impacting performance. Refer to the Media documentation to learn about the supported formats and variants.
The <picture> also renders with a custom css property --aspect-ratio corresponding to the image aspect ratio. The aspect ratio value is calculated as following: calc(image_height / image_width * 100%).
By using the --aspect-ratio property, it is possible to reserve appropriate spacing for responsive images by adding the following CSS:
picture[style*="--aspect-ratio"] {

    padding-top: var(--aspect-ratio);

    position: relative;

    display: block;

}

picture[style*="--aspect-ratio"] > img {

    position: absolute;

    top: 0;

    left: 0;

    width: 100%;

    height: 100%;

}
Images can be made accessibility friendly via the alt text and title properties which can be set by the author directly in the document. The values are reflected in the <img> element.
Images are loaded lazily by default for better loading performance.
All published images are provided by the Image API via https://api.doc2.site.
An example of a fully rendered image:
<picture style="--aspect-ratio:calc(500/300*100%)">

  <source type="image/avif" media="(max-width:300px)"

          srcset="https://api.doc2.site/v1/images/ID.300.avif">

  <source type="image/avif" media="(max-width:600px)"

          srcset="https://api.doc2.site/v1/images/ID.600.avif">

  <source type="image/avif" media="(max-width:900px)"

          srcset="https://api.doc2.site/v1/images/ID.900.avif">

  <source type="image/avif" media="(max-width:1200px)"

          srcset="https://api.doc2.site/v1/images/ID.1200.avif">

  <source type="image/avif" media="(max-width:1400px)"

          srcset="https://api.doc2.site/v1/images/ID.1400.avif">

  <source type="image/avif" media=""

          srcset="https://api.doc2.site/v1/images/ID.1600.avif">

  <source type="image/webp" media="(max-width:300px)"

          srcset="https://api.doc2.site/v1/images/ID.300.webp">

  <source type="image/webp" media="(max-width:600px)"

          srcset="https://api.doc2.site/v1/images/ID.600.webp">

  <source type="image/webp" media="(max-width:900px)"

          srcset="https://api.doc2.site/v1/images/ID.900.webp">

  <source type="image/webp" media="(max-width:1200px)"

          srcset="https://api.doc2.site/v1/images/API.1200.webp">

  <source type="image/webp" media="(max-width:1400px)"

          srcset="https://api.doc2.site/v1/images/API.1400.webp">

  <source type="image/webp" media=""

          srcset="https://api.doc2.site/v1/images/API.1600.webp">

  <source type="image/png" media="(max-width:300px)"

          srcset="https://api.doc2.site/v1/images/API.300.png">

  <source type="image/png" media="(max-width:600px)"

          srcset="https://api.doc2.site/v1/images/API.600.png">

  <source type="image/png" media="(max-width:900px)"

          srcset="https://api.doc2.site/v1/images/API.900.png">

  <source type="image/png" media="(max-width:1200px)"

          srcset="https://api.doc2.site/v1/images/API.1200.png">

  <source type="image/png" media="(max-width:1400px)"

          srcset="https://api.doc2.site/v1/images/API.1400.png">

  <source type="image/png" media=""

          srcset="https://api.doc2.site/v1/images/API.1600.png">

  <img alt="lorem ipsum" src="https://api.doc2.site/v1/images/API.default.png" loading="lazy" height="500" width="300"></picture>
<img> elements provided in component HTML templates sourced from the Image API are automatically converted in <picture> elements as the example above.
Server Side Rendering#
In the repository, we have the doc2.live.config.json file which is used to define the subdomain for development. There’s also another property in the configuration named ssr (short for Server Side Rendering), which allows us to decorate the markup of the page. The ssr accepts an array of objects to select one or multiple DOM elements on the page via hast utilities.
{

  "ssr": [

    {

      "path": "/",

      "select": {

        "body": {

          "class": "landing"

        }

      }

    },

    {

      "urlRegExp": "/stories/",

      "select": {

        "body": {

          "class": "story"

        }

      }

    },

    {

      "select": {

        "header img": {

          "width": 24,

          "height": 24,

          "loading": "eager"

        },

        "header > p": {

          "tagName": "a",

          "href": "https://doc2.site"

        },

        "header ul li:last-child a": {

          "target": "_blank"

        }

      },

      "selectAll": {

        "script[src*='columns'], script[src*='stories'], script[src*='contact'], script[src*='youtube']": {

          "tagName": "template"

        },

        "web-columns-item > h2": {

          "slot": "heading"

        },

        "web-columns-item > p": {

          "slot": "text"

        },

        "web-columns-item > p:has(picture)": {

          "slot": "illustration"

        },

        "web-columns-item > p:has(a)": {

          "slot": "action"

        }

      }

    }

  ]

}
In the example above, each object of ssr starts with a DOM selector either select or selectAll.
The selection of elements is executed in the order in which they are placed in the ssr array starting with the first entry. The object of a selector starts with the selector itself and contains the properties to be updated. Since we’re using web components, we can select component names that are prefixed with web-.
Selectors can optionally be limited to certain pages by using:
pathto match the exact page pathnamepathRegExpto match a page pathname with a regular expressionurlRegExpto match a page URL with a regular expression
There are special properties that can be used to alter the element altogether:
tagNamecan be used to change the tagName of a selected element.removecan be used to remove the element effectively not rendering it at all.
Try updating the body style to background:red then refresh the http://localhost:3000/github page to see the reflected changes.
The benefit of using web components is to make use of slotted elements and slots which are placeholders inside a web component that you can fill with your own markup, which lets you create separate DOM trees and present them together. Using the ssr config, we can define which elements inside web components should be slotted as shown in the example.
The select or selectAll selectors are good options when there is no server side logic required to render the page. There are some cases where it is necessary though for example to render data coming from a third party provider. To perform custom transformations on the DOM, use the transform selector to refer to a custom POST endpoint which accepts a JSON body containing the DOM as hast format and the requested url {"hast": {...}, url: "..." } and responds with the transformed JSON hast object.
The transform value can either be a proxied API which starts with /_apis/, a theme function e.g /custom-transformer or an external endpoint. Requests will timeout after 5 seconds by default. When using a proxied API, the property host must be specified to define which proxied API to use.
{

  "ssr": [

    {

      "urlRegExp": "/stories/",

      "host": "apis.site.com",

      "transform": "/_apis/dom-transformer"

    }

  ]

}
Schema#
Similar to the configuration file in the repository, the schema file doc2.live.schema.json is used to bridge the gap between the code and the content of a project. It’s a contract between the development team and content authors that helps writers to reuse existing components and templates to increase content velocity.
The property named library allows developers to define component and template examples using the hast format. For example, see the following 4 components from the Business Template:
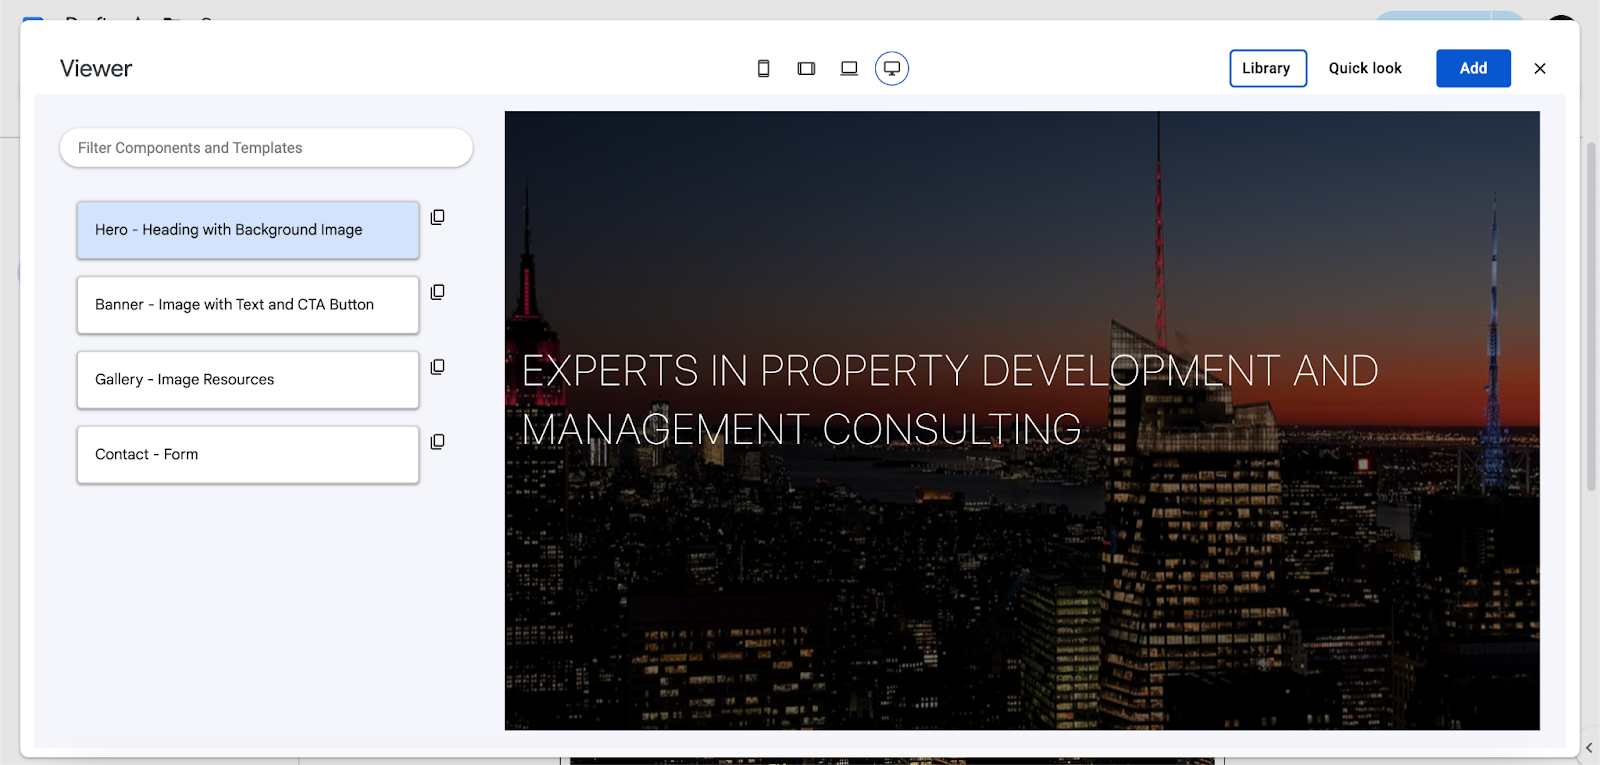
{ library: [{ name: 'Hero - Heading with Background Image', components: ['hero'], hast: { type: 'root', children: [ { type: "element", tagName: "hero", properties: { className: [ "fullscreen" ] }, children: [ { type: "element", tagName: "h1", properties: { id: "h.qqvv2ttwctq6" }, children: [ { type: "text", value: "Experts in Property Development and Management Consulting" } ] }, { type: "element", tagName: "p", properties: { }, children: [ { type: "element", tagName: "img", properties: { alt: "", src: "https://api.doc2.site/v1/images/7cbda228-7472-40b0-b7ce-0b093a892300.default.webp", title: "" }, children: [ ] } ] } ] } ] } }, { name: 'Banner - Image with Text and CTA Button', components: ['banner'], hast: { type: 'root', children: [ { type: "element", tagName: "banner", properties: { }, children: [ { type: "element", tagName: "p", properties: { }, children: [ { type: "element", tagName: "img", properties: { alt: "", src: "https://api.doc2.site/v1/images/dfcf6a7c-7ba8-4d4c-1abf-09df57c19300.default.webp", title: "" }, children: [ ] } ] }, { type: "element", tagName: "h2", properties: { id: "h.whle8qz23u3e" }, children: [ { type: "text", value: "Presentation" } ] }, { type: "element", tagName: "p", properties: { }, children: [ { type: "element", tagName: "strong", properties: { }, children: [ { type: "text", value: "Lorem ipsum dolor sit amet, consectetur adipiscing elit. Etiam iaculis placerat enim, vitae pulvinar risus rhoncus in. Fusce eleifend lorem dignissim erat sodales commodo." } ] } ] }, { type: "element", tagName: "p", properties: { }, children: [ { type: "text", value: "Nullam porttitor sem et dolor vehicula, sed aliquam mi ullamcorper. Praesent rhoncus at sem non tristique. Curabitur venenatis consequat felis vitae feugiat. In condimentum hendrerit placerat. Morbi laoreet enim quis lobortis accumsan." } ] }, { type: "element", tagName: "p", properties: { }, children: [ { type: "text", value: "Aliquam a odio viverra, rhoncus odio sed, ullamcorper nulla. Maecenas ac venenatis erat. Aliquam auctor aliquet vestibulum. Pellentesque vel dolor elementum, placerat augue nec, consectetur leo." } ] }, { type: "element", tagName: "p", properties: { }, children: [ { type: "text", value: "Maecenas vehicula, nisl vel vulputate cursus, arcu diam egestas ipsum, id volutpat lectus justo quis augue. Proin non faucibus elit." } ] }, { type: "element", tagName: "p", properties: { }, children: [ { type: "text", value: "Quisque consectetur feugiat porttitor. Pellentesque ac elit posuere nibh vulputate elementum. Nulla sollicitudin vel metus eu facilisis." } ] }, { type: "element", tagName: "p", properties: { }, children: [ { type: "element", tagName: "a", properties: { href: "https://docs.google.com/document/d/1lFM0VKKzub3u5s5CcFCcXpogEFuYpIeQ80iV6O2ALeM/edit?usp=drive_link" }, children: [ { type: "text", value: "Read All" } ] } ] } ] } ] } }, { name: 'Gallery - Image Resources', components: ['gallery', 'gallery-item'], hast: { type: 'root', children: [ { type: "element", tagName: "gallery", properties: { }, children: [ { type: "element", tagName: "gallery-item", properties: { }, children: [ { type: "element", tagName: "h2", properties: { id: "h.mjrlca1gz9d0" }, children: [ { type: "text", value: "Customers" } ] } ] }, { type: "element", tagName: "gallery-item", properties: { }, children: [ { type: "element", tagName: "p", properties: { }, children: [ { type: "element", tagName: "img", properties: { alt: "", src: "https://api.doc2.site/v1/images/81a9d4e2-38c0-4c88-2822-e6aeb55d1000.default.webp", title: "" }, children: [ ] } ] }, { type: "element", tagName: "p", properties: { }, children: [ { type: "element", tagName: "a", properties: { href: "https://docs.google.com/document/d/1GjerVNHpckt3fzAXKrQJfMxon1EMkRlfkzH9h8Ug-yw/edit#" }, children: [ { type: "text", value: "Freedom" } ] } ] } ] }, { type: "element", tagName: "gallery-item", properties: { }, children: [ { type: "element", tagName: "p", properties: { }, children: [ { type: "element", tagName: "img", properties: { alt: "", src: "https://api.doc2.site/v1/images/4fb07bba-9b7c-42c9-a6b7-19812637d000.default.webp", title: "" }, children: [ ] } ] }, { type: "element", tagName: "p", properties: { }, children: [ { type: "element", tagName: "a", properties: { href: "https://docs.google.com/document/d/1GjerVNHpckt3fzAXKrQJfMxon1EMkRlfkzH9h8Ug-yw/edit#" }, children: [ { type: "text", value: "Triangle" } ] } ] } ] }, { type: "element", tagName: "gallery-item", properties: { }, children: [ { type: "element", tagName: "p", properties: { }, children: [ { type: "element", tagName: "img", properties: { alt: "", src: "https://api.doc2.site/v1/images/ce90023c-f273-4498-6838-8463864ed700.default.webp", title: "" }, children: [ ] } ] }, { type: "element", tagName: "p", properties: { }, children: [ { type: "element", tagName: "a", properties: { href: "https://docs.google.com/document/d/1GjerVNHpckt3fzAXKrQJfMxon1EMkRlfkzH9h8Ug-yw/edit#" }, children: [ { type: "text", value: "Astrotech" } ] } ] } ] }, { type: "element", tagName: "gallery-item", properties: { }, children: [ { type: "element", tagName: "p", properties: { }, children: [ { type: "element", tagName: "img", properties: { alt: "", src: "https://api.doc2.site/v1/images/90c21564-36a4-4cd3-7a76-e95720d42300.default.webp", title: "" }, children: [ ] } ] }, { type: "element", tagName: "p", properties: { }, children: [ { type: "element", tagName: "a", properties: { href: "https://docs.google.com/document/d/1GjerVNHpckt3fzAXKrQJfMxon1EMkRlfkzH9h8Ug-yw/edit#" }, children: [ { type: "text", value: "Phoenix" } ] } ] } ] } ] } ] } }, { name: 'Contact - Form', components: ['contact'], hast: { type: 'root', children: [ { type: "element", tagName: "contact", properties: { }, children: [ { type: "element", tagName: "h2", properties: { id: "h.kogyi29i03lr" }, children: [ { type: "text", value: "Let’s get in touch" } ] } ] } ] } }] }
Full page templates are also supported in the library see the following example from the Blog Template:
{ library: [{ components: ['post'], meta: { title: 'Post - Sample with text and image', template: 'post' }, hast: { type: 'root', children: [ { type: "element", tagName: "post", properties: { }, children: [ { type: "element", tagName: "h1", properties: { id: "h.9p0hiqna0hco" }, children: [ { type: "text", value: "Machu Picchu, Peru - Unveiling the Mysteries of the Inca Empire" } ] }, { type: "element", tagName: "p", properties: { }, children: [ { type: "text", value: "Welcome to Machu Picchu, the crown jewel of the Inca Empire and one of the most awe-inspiring archaeological sites in the world. Nestled high in the Andes Mountains of Peru, Machu Picchu beckons adventurers and history enthusiasts alike to unravel its ancient mysteries and marvel at its breathtaking beauty. Join me on a journey through time as we explore the wonders of this legendary citadel." } ] }, { type: "element", tagName: "p", properties: { }, children: [ { type: "element", tagName: "img", properties: { alt: "", src: "https://api.doc2.site/v1/images/cc42506c-d20c-49d4-11df-b3c628b58400.default.webp", title: "", width: 671.29, height: 378.26 }, children: [ ] } ] }, { type: "element", tagName: "h2", properties: { id: "h.r207bhxxipj2" }, children: [ { type: "text", value: "People" } ] }, { type: "element", tagName: "p", properties: { }, children: [ { type: "text", value: "Peruvian culture is a vibrant tapestry woven from indigenous traditions, Spanish colonial influences, and modern innovation. In the Andean highlands surrounding Machu Picchu, you'll encounter Quechua-speaking communities whose way of life has remained largely unchanged for centuries. Hospitality is a cornerstone of Peruvian culture, and locals welcome visitors with open arms, eager to share their heritage and traditions." } ] }, { type: "element", tagName: "h2", properties: { id: "h.bmr07ihlbix2" }, children: [ { type: "text", value: "Food" } ] }, { type: "element", tagName: "p", properties: { }, children: [ { type: "text", value: "Peruvian cuisine is celebrated worldwide for its bold flavors, diverse ingredients, and rich culinary history. In the Sacred Valley near Machu Picchu, you'll have the opportunity to sample traditional Andean dishes such as ceviche, quinoa soup, and lomo saltado, a savory stir-fry of beef, onions, and tomatoes. Be sure to try a Pisco Sour, Peru's national cocktail, made with Pisco brandy, lime juice, syrup, egg white, and bitters." } ] }, { type: "element", tagName: "h2", properties: { id: "h.hm07g74djbi7" }, children: [ { type: "text", value: "Traditions" } ] }, { type: "element", tagName: "p", properties: { }, children: [ { type: "text", value: "The legacy of the Inca Empire is alive and well in the Sacred Valley, where ancient customs and rituals continue to be practiced to this day. Visit local markets like Pisac or Chinchero, where indigenous artisans sell handmade textiles, pottery, and jewelry using techniques passed down through generations. Witness traditional ceremonies honoring Pachamama (Mother Earth) and Apus (mountain spirits), which play a central role in Andean spirituality." } ] }, { type: "element", tagName: "h2", properties: { id: "h.ccbrgipr8leg" }, children: [ { type: "text", value: "Environment" } ] }, { type: "element", tagName: "p", properties: { }, children: [ { type: "text", value: "As you journey to Machu Picchu, you'll traverse the breathtaking landscapes of the Sacred Valley, where snow-capped peaks, emerald-green valleys, and rushing rivers create a stunning backdrop for your adventure. Begin your pilgrimage in the historic city of Cusco, the former capital of the Inca Empire and a UNESCO World Heritage Site. Explore its cobblestone streets, colonial architecture, and ancient Inca ruins, including the nearby fortress of Sacsayhuaman." } ] }, { type: "element", tagName: "p", properties: { }, children: [ { type: "text", value: "From Cusco, embark on the iconic Inca Trail or opt for the more leisurely train journey to Aguas Calientes, the gateway to Machu Picchu. Wake before dawn to catch the first rays of sunlight illuminating the citadel, bathing it in a golden glow and revealing its majestic splendor. Wander through the terraced fields, temples, and stone buildings of Machu Picchu, marveling at the ingenuity of its Inca builders and the mystical aura that surrounds this sacred site." } ] }, { type: "element", tagName: "p", properties: { }, children: [ { type: "text", value: "For the adventurous spirit, hike to the summit of Huayna Picchu or Machu Picchu Mountain for panoramic views of the surrounding Andes and the winding Urubamba River below. As you stand atop these ancient peaks, you'll feel a deep connection to the land and its storied past, a testament to the enduring legacy of the Inca Empire." } ] }, { type: "element", tagName: "p", properties: { }, children: [ { type: "text", value: "As you bid farewell to Machu Picchu, you'll carry with you not just memories of a remarkable journey, but a profound appreciation for the rich tapestry of history, culture, and natural beauty that defines this sacred land. Machu Picchu is more than just a destination; it's a pilgrimage to the heart of the Andes, a testament to the enduring spirit of the Inca people and the timeless allure of Peru's ancient past." } ] } ] } ] } }] }
Finally, the schema supports multiple fields to provide context to the Editor and the AI Web Content Assistant. The fields are suggestions, components, templates and metas. Without them, the Editor won’t recognize which components are displayed and won’t be able to edit them.
With suggestions, you can create recommendations for authors on how to get started with the AI Web Content Assistant. With components, templates and metas you can provide meaning and hints to each element in addition to the examples coming from the library.
To add more context to the previous example from the Blog Template:
{

  library: [...]

  suggestions: [

    "Start a blog post about a trip in the Indian Ocean."

  ]

  components: [

    {

      name: 'Hero',

      description: "To grab the user's attention with a stunning image and a SEO optimized title and description.",

      variations: {

        fullscreen: 'Image covers the full screen.'

      },

      properties: {

        'image-size': 'Use "cover" to fill the screen and clip the image. Use "contain" to fill the screen without clipping it. Use "repeat" to repeat the image to fill the screen.'

      },

      content: 'Supports h1, paragraphs and images.'

    }

  ],

  templates: [

    {

      name: 'Post',

      description: "To describe blog posts about travel trips. Should contain at least 3 sections about food, people and culture."

    }

  ],

  metas: [

    {

      name: 'keywords',

      description: "SEO optimized keywords taken from the page title or description."

    }

  ]

}
The AI Web Content Assistant is only available to our Enterprise customers.
Web components#
Components are written as Web Components which consist of three main technologies: custom elements, shadow DOM and HTML templates. Components on the page are automatically loaded from /components/COMPONENT_NAME/COMPONENT_NAME.js, /components/COMPONENT_NAME/COMPONENT_NAME.css and optionally /components/COMPONENT_NAME/COMPONENT_NAME.html by default. Component items are loaded from the parent component folder e.g. /components/COMPONENT_NAME/COMPONENT_NAME-item.js.
The component JS script file is loaded as a module which allows using import and export statements. Let’s have a closer look at one of the example components: the hero. The component JS file has no special behavior, it is just registering the custom element <web-hero> and extending the base component.
import Component from "../../scripts/component.js";

window.customElements.define('web-hero', class extends Component {

    constructor() {

        super();

    }

});
The base component includes a temporary polyfill to support Declarative Shadow Dom (DSD) on Firefox. DSD is extensively used in the component templates even if it’s just used as an element wrapper with a default slot.
Component templates can hold any HTML which will be injected server side inside of the component before its main content which means that it’s not solely reserved for DSD but can be used for light DOM as well or a mix of DSD and slotted light DOM for more advanced use cases.
The combination of DSD slotted elements and setting slot properties via the ssr config allows for flexible and performant edge server-side streamed content rendering.
Let’s take a look at the <web-columns-item> which uses DSD with named slots.
<template shadowrootmode="open">

    <div part="aside">

        <slot name="illustration"></slot>

    </div>

    <div part="main">

        <slot name="heading"></slot>

        <slot name="text"></slot>

        <slot name="action"></slot>

    </div>

</template>
The hydration of web components can be executed in a surgical manner to add interactivity or custom behaviors.
Tip: component hydration can be delayed or performed only when the component enters the viewport if required. This technique can improve performance as it reduces the rendering critical rendering path.
Styling is another aspect of web components that is particular as styles can either be global or encapsulated. To style light DOM elements of the component, use /components/COMPONENT_NAME/COMPONENT_NAME.css. Shadow DOM elements can be styled as well in this stylesheet by using the part attribute which allows CSS to select and style specific elements in a shadow tree via the ::part pseudo-element.
Another option is to include styles as part of DSD either as inline stylesheet or as an external stylesheet to style shadow dom elements. An example of that can be found in the contact component template.
The Web Components features are performant, flexible, and native to the Web Platform making them the ideal candidates to build modern and fast Web Experiences that will last.
APIs#
Sometimes, you’ll have to integrate a 3rd party API which means managing secrets to access it. This can be done within the apis sheet in the doc2.live.config spreadsheet which will allow proxying any specified API via the reserved /_apis endpoint if it matches the configuration. The apis configuration requires setting the API host, path, method and authorization header which is redacted by default. Any extra column will be added as an additional header to the proxied request.
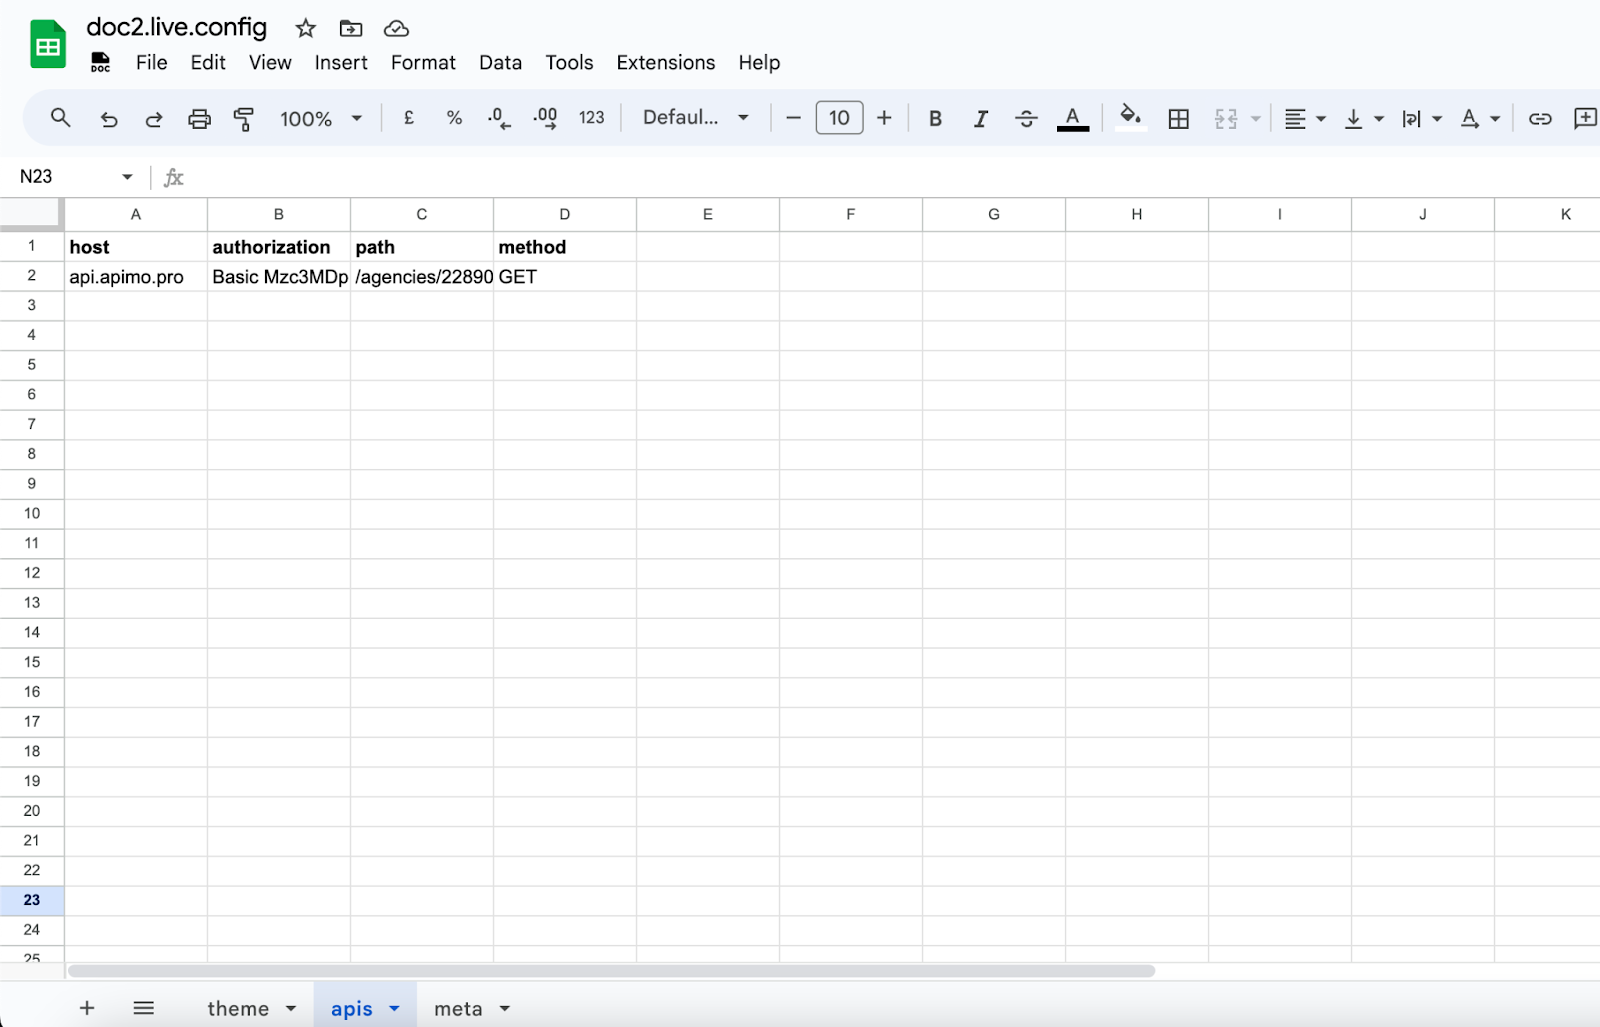
You can then call the 3rd party API client-side by adding the x-forwarded-api header to the request for example:
fetch('/_apis/PATH', {

  headers: {

    'x-forwarded-api': HOST

  }

});
Custom HTTP response headers#
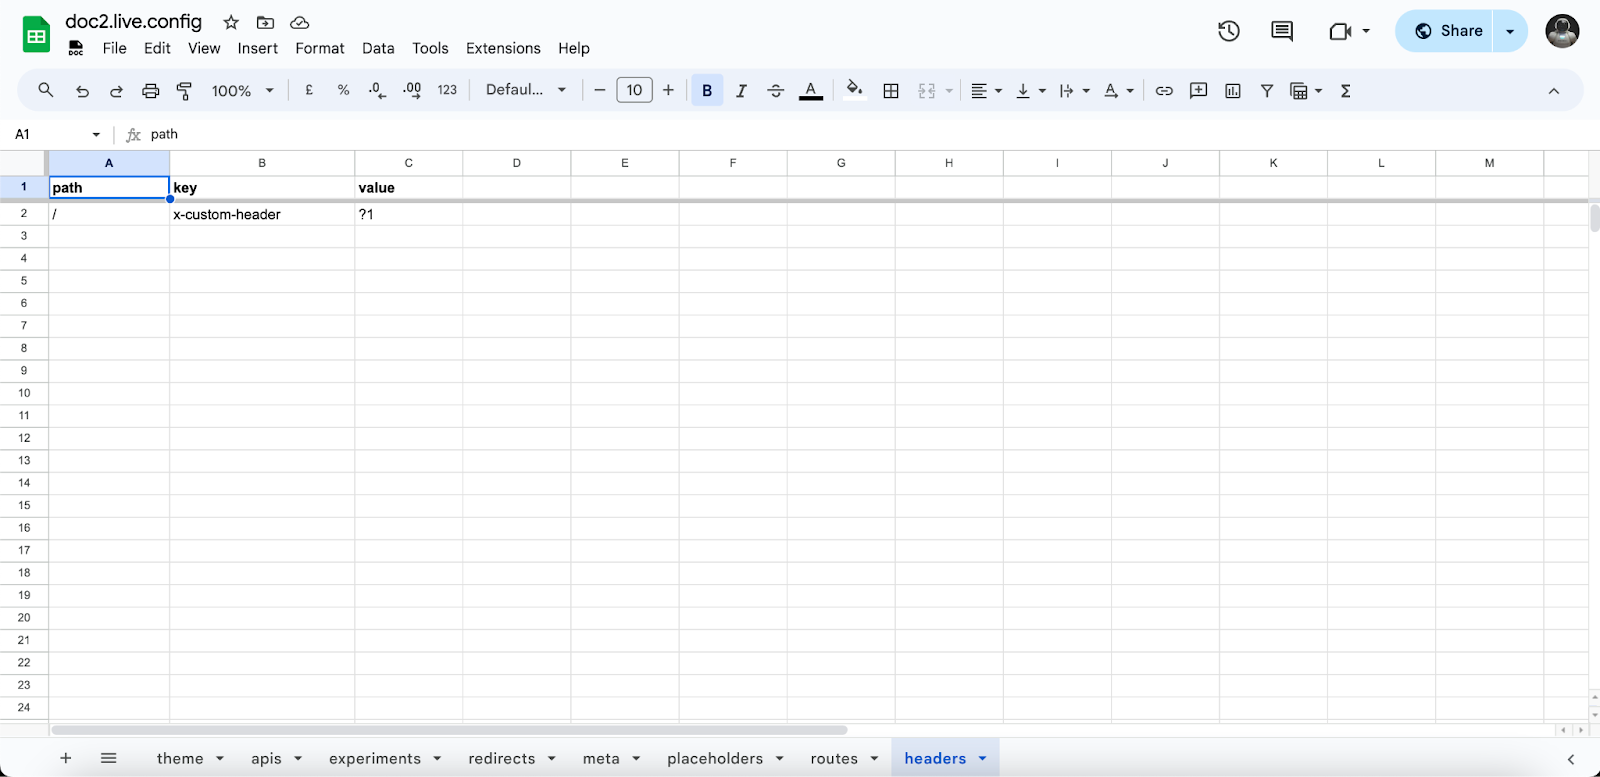
Applying custom HTTP response headers to static resources and pages is possible by creating a headers sheet in the doc2.live.config spreadsheet. To specify header key and values, use the following columns:
keyfor the header key e.g.x-custom-header.valuefor the header value e.g.?1.- Optionally
pathto match a resource with the exact pathname - Optionally
pathRegExpto match a resource pathname with a regular expression - Optionally
urlRegExpto match a resource URL with a regular expression
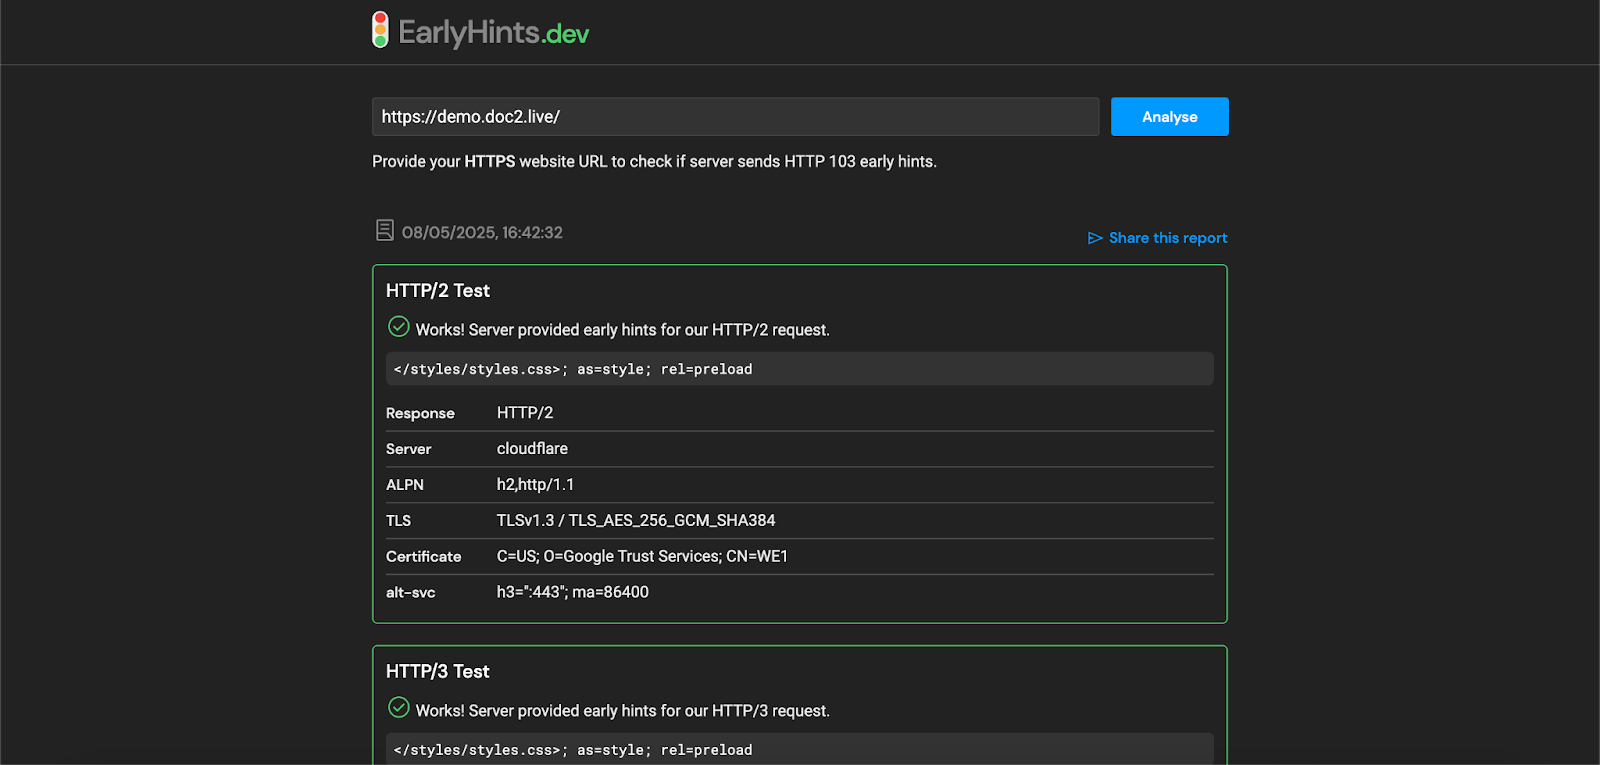
Early Hints#
Boosting your site loading speed via server early hints is supported. To enable early hints, set the Link header value via Custom HTTP response headers.
The Link header value format is <uri-reference>; param1=value1; param2="value2".
Multiple resources can be defined as well for example: <https://one.example.com>; rel="preconnect", <https://two.example.com>; rel="preconnect", <https://three.example.com>; rel="preconnect".
You can verify that your site has early hints enabled on https://earlyhints.dev. For example, the demo site https://demo.doc2.live has /styles/styles.css defined as early hints.
Custom routes#
It is common to serve multiple URLs from a single document, displaying dynamic content for large portions of the page without requiring authors to create each page individually. This approach streamlines content management and allows for efficient scaling of websites with dynamic content.
Example:
- URL:
www.example.com/products/12345 - Dynamic Content: Fetch product details for product ID
12345and display using a product template.
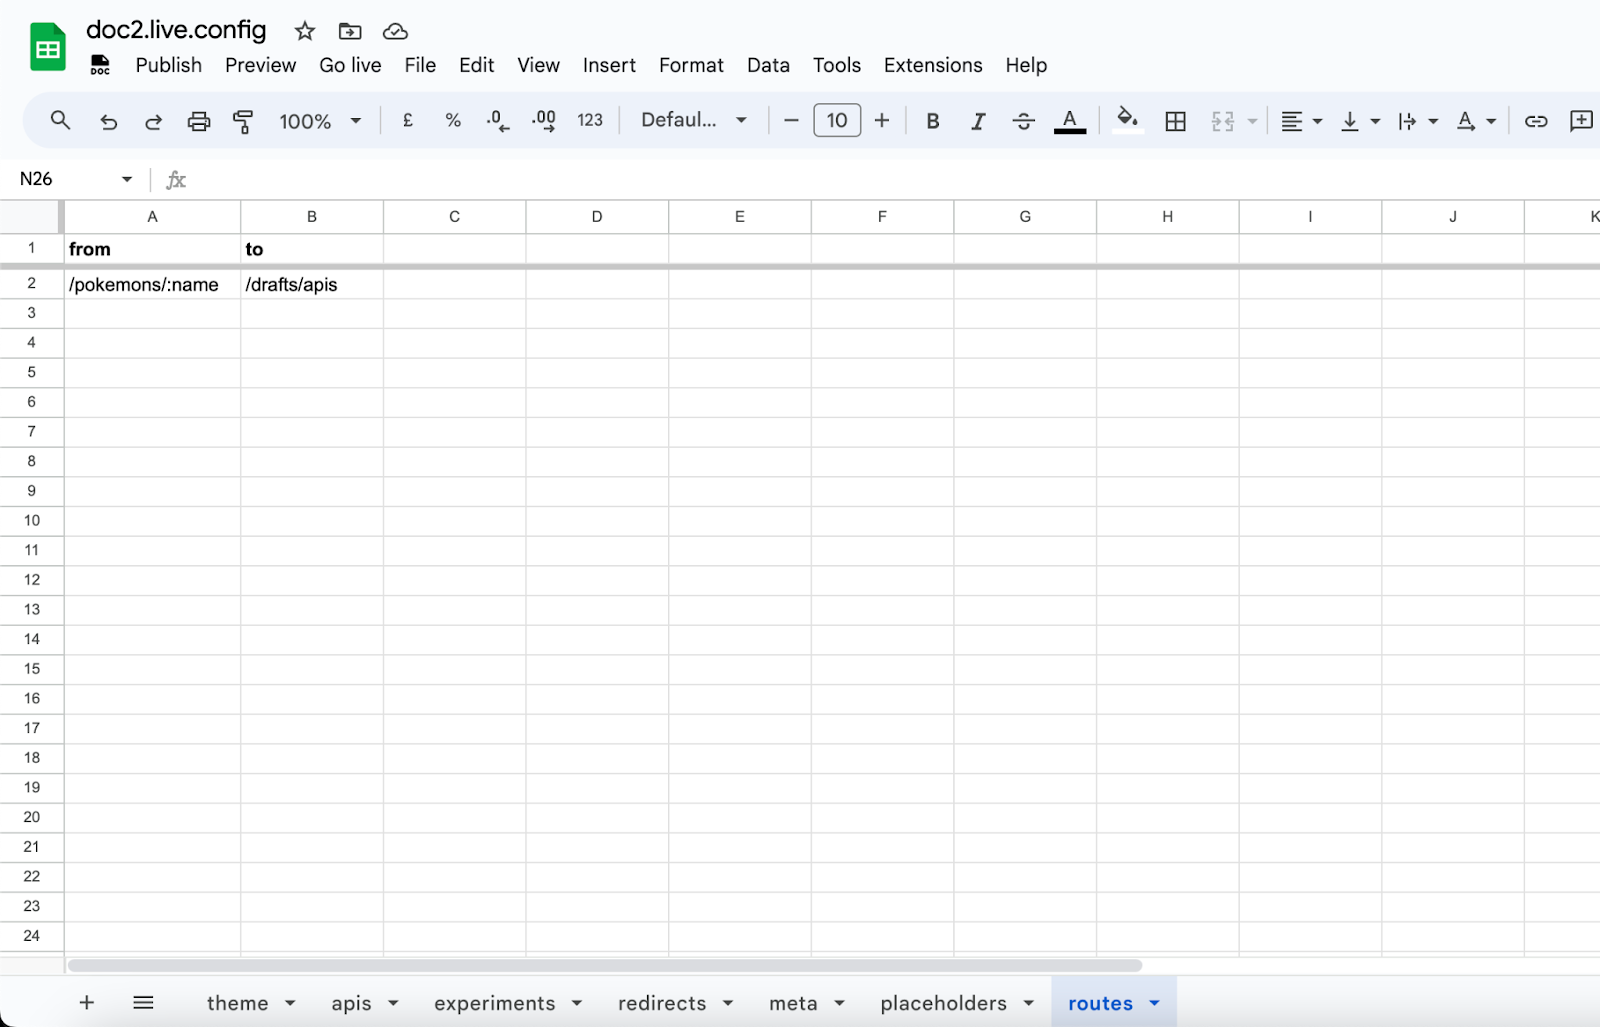
Routes can be added to the doc2.live.config spreadsheet via the routes sheet. The routes sheet supports the columns:
fromwhich accepts a pathname to route from.towhich accepts a pathname to a published document.
The from property supports capturing named parameters as following:
:nameto capture from the route up to/or end of string.*splatto capture from the route up to end of string.()optional group that doesn't have to be part of the query. Can contain nested optional groups, params, and splats.
Some examples:
/products/:idwith the path/products/12345will return the route parameterid:'12345'/posts/*pathwith the path/posts/trips/tokyowill return the route parameterpath:'trips/tokyo'/dashboard/:project/(:section)with the path/dashboard/my-shop/settingswill return the route parametersproject:'my-shop', section:'settings'
Only the first matching route will be used and following matching routes are ignored.
An example from the pokemon component on the preview branch https://pokemon--preview--demo.doc2.live/pokemons/ditto which is a custom route defined as /pokemons/:name pointing to another published document.
Dynamic templates#
Another component template functionality is the built-in support of APIs. It allows server-side rendering of document, sheet data or 3rd party API JSON data. Currently, the dynamic templates support Mustache, a logic-less template engine.
To use dynamic templates in a component template, the following conditions have to be met:
- Use the
<template>element. - Use the
doc2-sourceattribute on the template and set the value to either a proxied API which starts with/_apis/, a theme file e.g/myfile.jsonor an external endpoint.Requests will timeout after 5 seconds by default. - Use the
doc2-template-engineattribute set tomustache. - Use the
doc2-methodattribute, if omitted the default value isGET.
The output will be automatically rendered next to the template inside the component.
Optionally, the following attributes are supported to allow for advanced use cases:
- Use
doc2-headersto submit custom headers. - Use
doc2-bodyto submit data along. - Use
doc2-query-engineattribute set toJMESPath. - Use the
doc2-queryand set the value to a JMESPath query to filter the returned data from the request.
Here’s an example from the stories component in https://demo.doc2.live where an index of the latest published documents is rendered. The stories are filtered by path sorted by publishedDate.
<template

    doc2-source="https://api.doc2.site/v1/docs/search/SPACE/1n98BBrnbQW3Dzgq0Go6tyJOgk2l95Ee_"

    doc2-template-engine="mustache"

    doc2-method="POST"

    doc2-body="engine=JMESPath&query=reverse(sort_by([?starts_with(path, '/stories')], %26publishedAt)[*].{path: path, title: meta.title, publishedAt: publishedAt})">

{{#data}}

        <a href="{{path}}">

            <h3>{{title}}</h3>

        </a>

{{/data}}

</template>
And the resulting HTML:
<a href="/stories/leverage-chat-gpt-and-dall-e">

  <h3>Leverage Chat GPT and Dall-E to increase your content velocity</h3>

</a>

<a href="/stories/enhancing-seo-driven-content-creation">

  <h3>The Power of AI: Enhancing SEO-Driven Content Creation</h3>

</a>

<a href="/stories/building-websites-with-google-docs-and-sheets">

  <h3>Building Websites with Google Docs and Sheets: A Powerful Collaboration Tool</h3>

</a>
Another example from the contact component in https://demo.doc2.live where we render the latest submission stored in a sheet:
<template

  doc2-source="https://api.doc2.site/v1/spreadsheets/search/SPACE/1n98BBrnbQW3Dzgq0Go6tyJOgk2l95Ee_/1Ji5XuASqyWfqSSmJM0KGxsvJ1HGphNMpuJl26zzmZ4U/0"

  doc2-template-engine="mustache"

  doc2-method="POST"

  doc2-body='engine=JMESPath&query=rows[-1:]'

  slot="example">

{{#data}}

      <strong>Latest submission by {{name}}</strong>

      <p>{{submission}}</p>

{{/data}}

</template>
The doc2- attributes support the following variables:
- Dynamic workspace with
SPACE(Preview or Live ). - Component properties with
PROPERTIES.key. This allows authors setting data spreadsheets as data source for example. - Route params properties for matching custom routes via
ROUTE_PARAMS.key. This allows pagination or dynamic pages use cases which should render content referenced by id for example. - Similar to route params, search params properties defined in the URL can be targeted with
SEARCH_PARAMS.key.
Here is an example from the pokemon component on the preview branch https://pokemon--preview--demo.doc2.live/drafts/apis?pokemon=ditto where we render the content from a proxied API using SEARCH_PARAMS and a JMESPath query on the returned data:
<template

        doc2-source="/_apis/api/v2/pokemon/SEARCH_PARAMS.pokemon"

        doc2-template-engine="mustache"

        doc2-method="GET"

        doc2-headers='{"x-forwarded-api": "pokeapi.co"}'

        doc2-query-engine="JMESPath"

        doc2-query="{name: name, sprites: {front: sprites.front_default, back: sprites.back_default}} ">

{{#name}}

    <table>

        <thead>

        <tr>

            <th>Name</th>

            <th>Front</th>

            <th>Back</th>

        </tr>

        </thead>

        <tbody>

        <tr>

            <td>{{name}}</td>

            <td><img alt="{{name}} front" height="96" width="96" src="{{sprites.front}}"/></td>

            <td><img alt="{{name}} back" height="96" width="96" src="{{sprites.back}}"/></td>

        </tr>

        </tbody>

    </table>

{{/name}}

{{^name}}

    <h2>Pokemon not found</h2>

{{/name}}

</template>
Experimentation#
You can enable experimentations per page which will give you access to more detailed visitor information if available under the form of <meta> elements including:
user-agentconnecting-ipipcountryipcityipcountryipcontinentiplongitudeiplatituderegionregion-codemetro-codepostal-codetimezonesec-ch-ua-mobilesec-ch-ua-platformrefereraccept-language
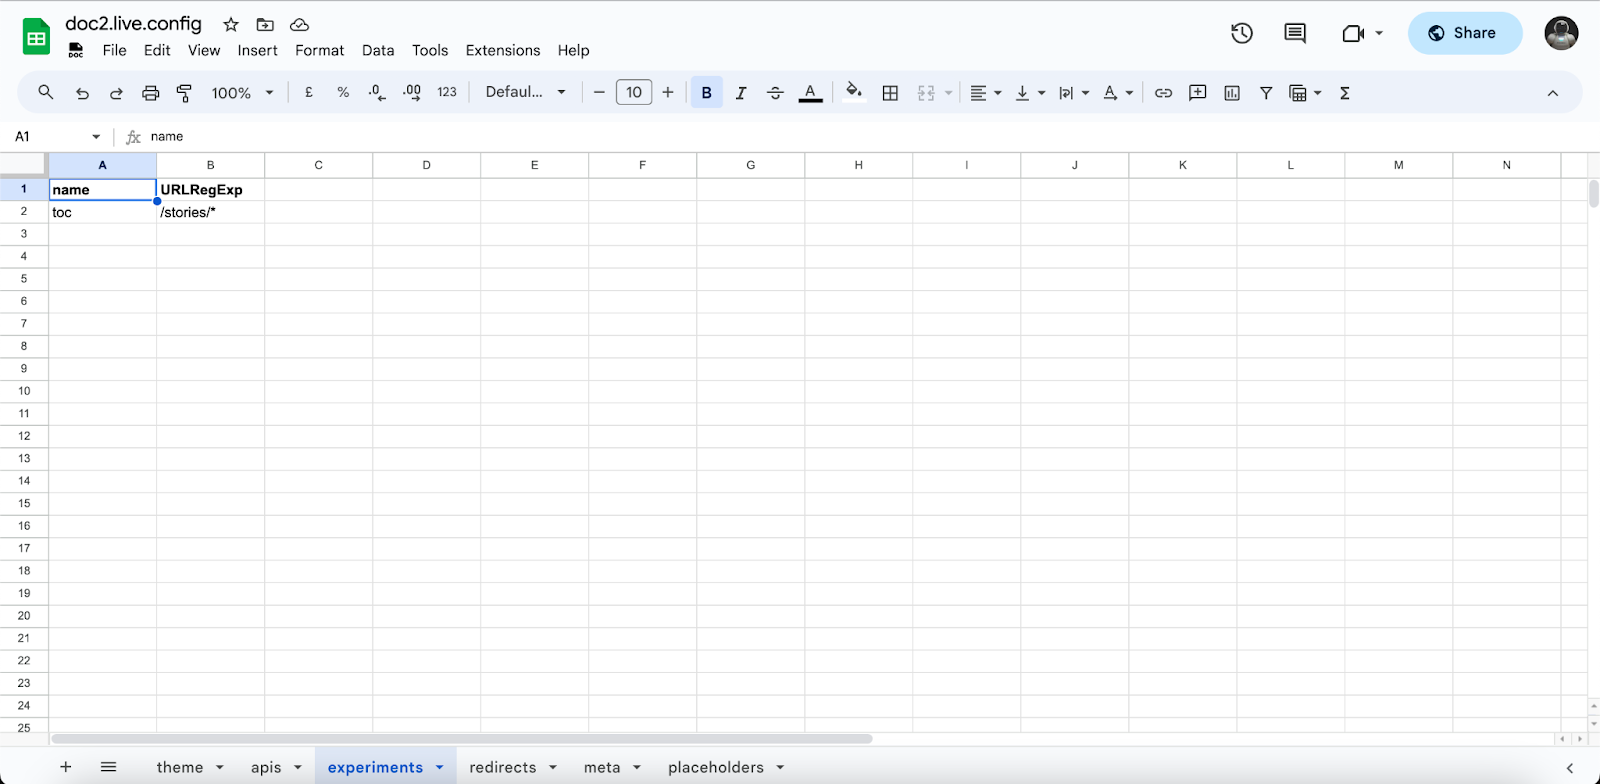
To add experiments, simply create an experiments sheet in the doc2.live.config spreadsheet and add the following columns:
nameof the experiment. Multiple experiments can coexist for the same page.pathto match the experiment with the exact page pathnamepathRegExpto match a page pathname with a regular expressionurlRegExpto match a page URL with a regular expression
Use experiments to better identify your audience and create different experiences to personalize and optimize the content. For example in the demo ssr config, the stories table of content is hidden for Firefox users via the following selector:
{

  "urlRegExp": "/stories/",

  "select": {

    "html:has(meta[name='user-agent'][content*='Firefox']) web-blog": {

      "class": "no-toc"
   }

  }

}
Cache and Purge#
By default, GET requests for pages and theme files are cached for 5 minutes if they are matching following criterias:
- No page query parameters
- No page experimentation enabled
200status code response
The caching duration can be customized by adding the cache sheet to the doc2.live.config spreadsheet. The cache sheet supports 3 columns:
pathto match the exact page pathnamepathRegExpto match a page pathname with a regular expressionttlthe custom caching duration in seconds
In the following example, the caching duration is set to 1 day for all pages and theme files.

The cache can be purged manually if users have write access to the root folder via the reserved /_purge endpoint. The purge request requires the basic authorization header and tags to define which content should be purged. The following tags are supported:
*to purge all contentpagesto purge all pages (e.g. home page)themeto purge theme files (e.g. styles and scripts)pathto purge a specific file (e.g. home page or theme file)
const user = {

  email: 'user@example.com',

  secret: 'USER_SECRET'

}

const authorization = `basic ${btoa(`${user.email}:${user.secret}`)}`;


// Purge everything

const tags = ['*'];

// Purge all pages

// const tags = ['pages'];

// Purge all theme files

// const tags = [theme'];

// Purge specific files

// const tags = ['/contact-us', '/scripts/scripts.js'];

fetch('https://SUBDOMAIN.doc2.live/_purge', {

    method: 'POST',

    headers: {

        authorization,

        'content-type': 'application/json'

    },

    body: JSON.stringify({

        tags

    })

});

// Purge completed if response is 'ok'
Redirects#
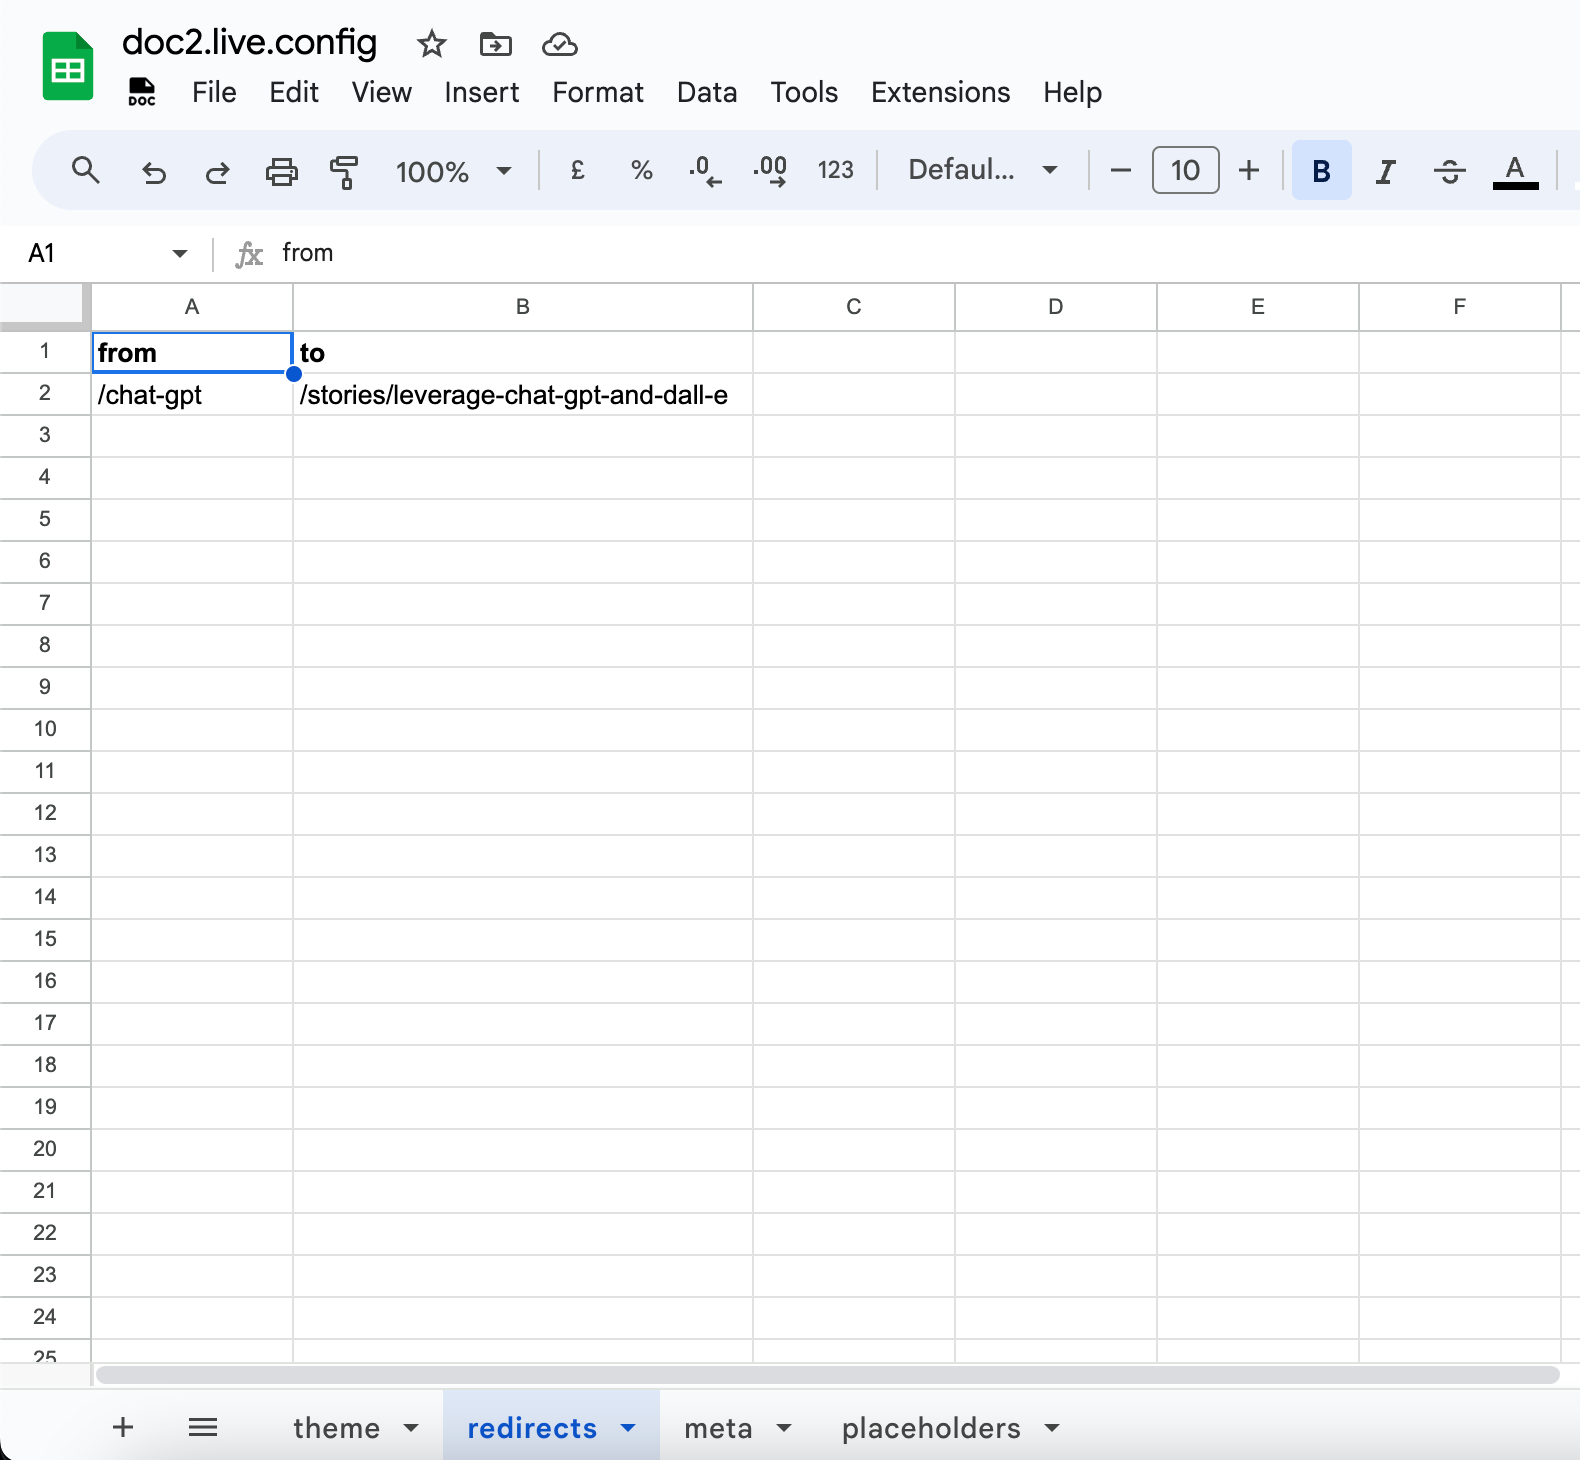
Redirects can be added to the doc2.live.config spreadsheet. The sheet has to be named redirects. The redirect sheet supports the columns:
fromwhich accepts a pathname to redirect from.towhich accepts a pathname or a fully qualified URL to redirect to.
The configuration example below redirects https://demo.doc2.live/chat-gpt to https://demo.doc2.live/stories/leverage-chat-gpt-and-dall-e.
Default Metadata#
Default metadata is metadata that serves as fallback metadata to published documents missing the metadata or to define global metadata that is applicable to every published document.
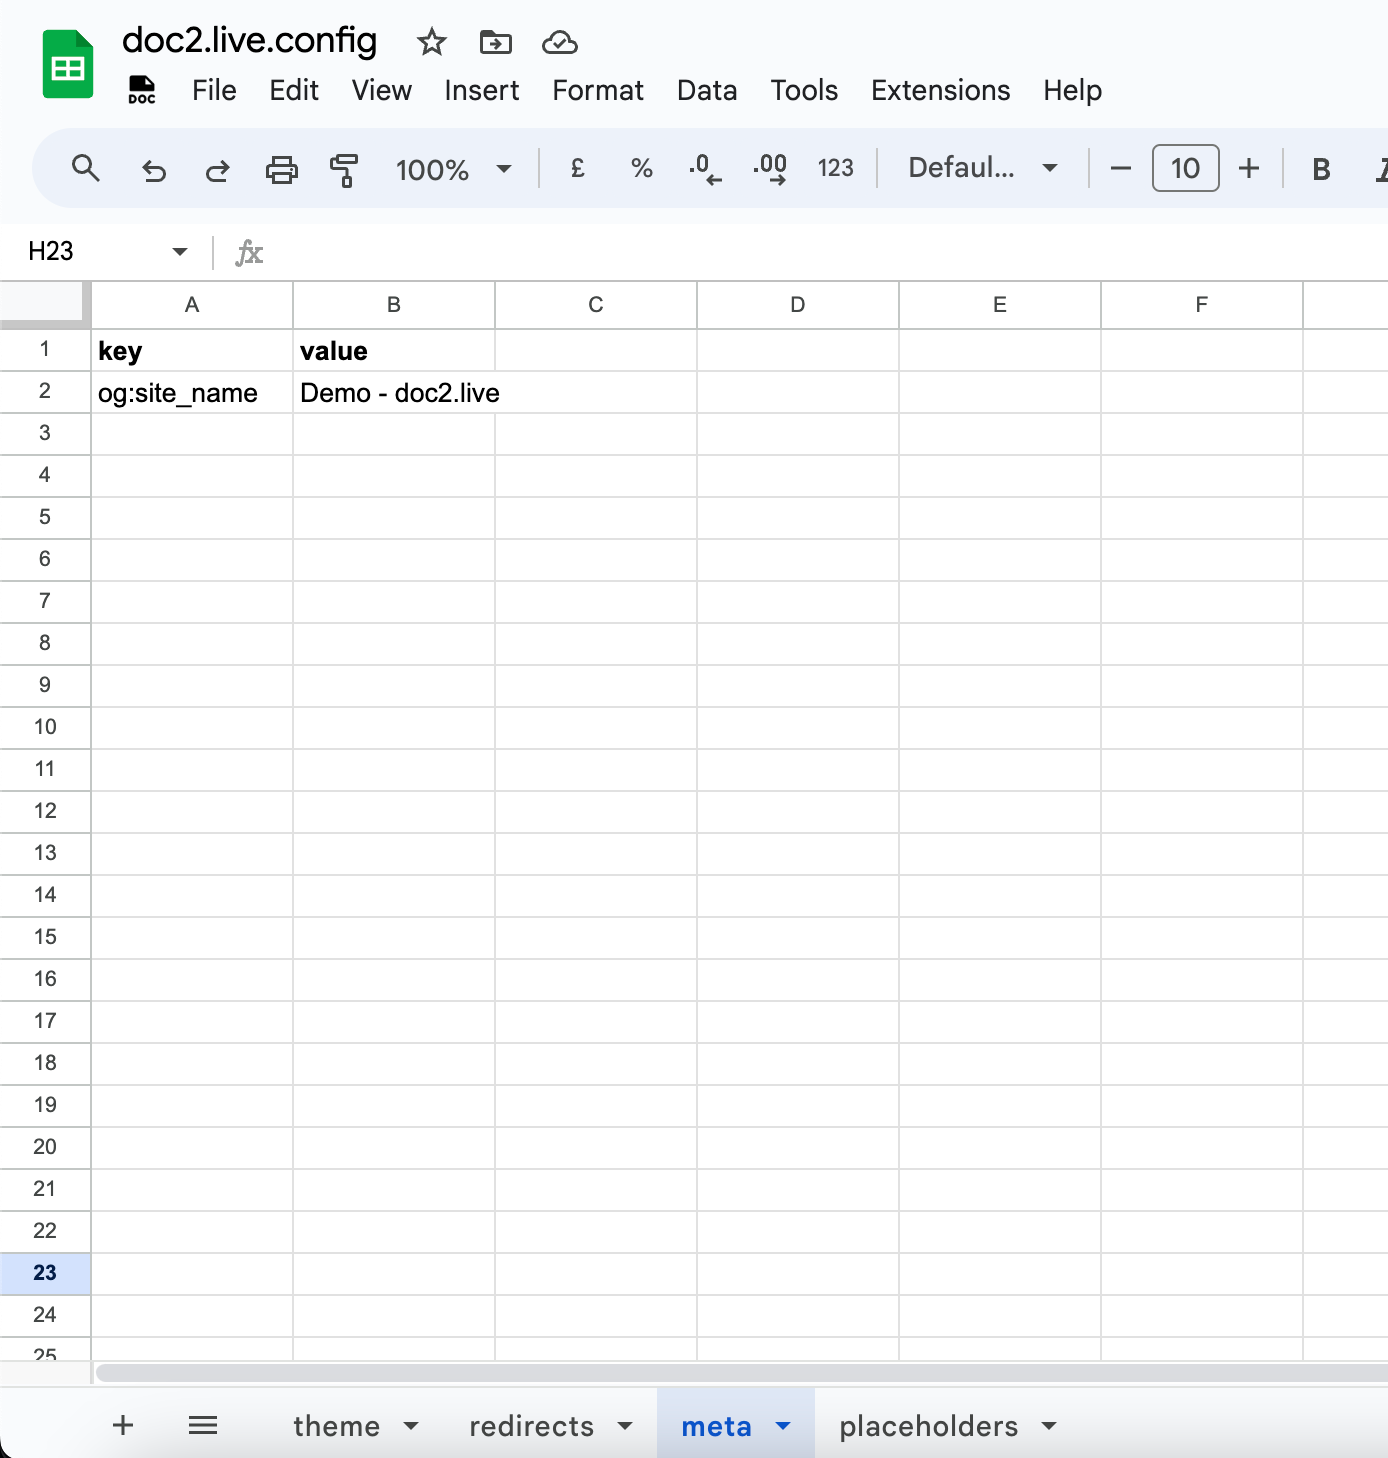
It can be defined in the doc2.live.config in the meta sheet using key and value columns. Conditional metadata can be specified by adding a 3rd column:
pathto match the exact page pathnamepathRegExpto match a page pathname with a regular expressionurlRegExpto match a page URL with a regular expression
In the example below, the metadata og:site_name is defined for all pages.
Special metadata will be injected to the page by default if not explicitly specified:
Key | Description | Default |
|---|---|---|
lang | Page language | en |
dir | Page text direction | ltr |
charset | HTML encoding | utf-8 |
viewport | Page visible area | width=device-width, initial-scale=1 |
title | Page title | Page URL |
description | Page description | |
components | Components on the page | |
tags | Page hashtags | |
published-at | Publication date | |
published-by | Author name | |
experiments | Page experiment names if defined | |
route | Matching custom route parameters if defined | |
og:url | Open Graph page canonical URL | |
og:title | Open Graph page title | |
og:description | Open Graph page description | |
og:image | Open Graph page thumbnail | |
twitter:title | Twitter page title | |
twitter:description | Twitter page description | |
twitter:image | Twitter page thumbnail |
Placeholders#
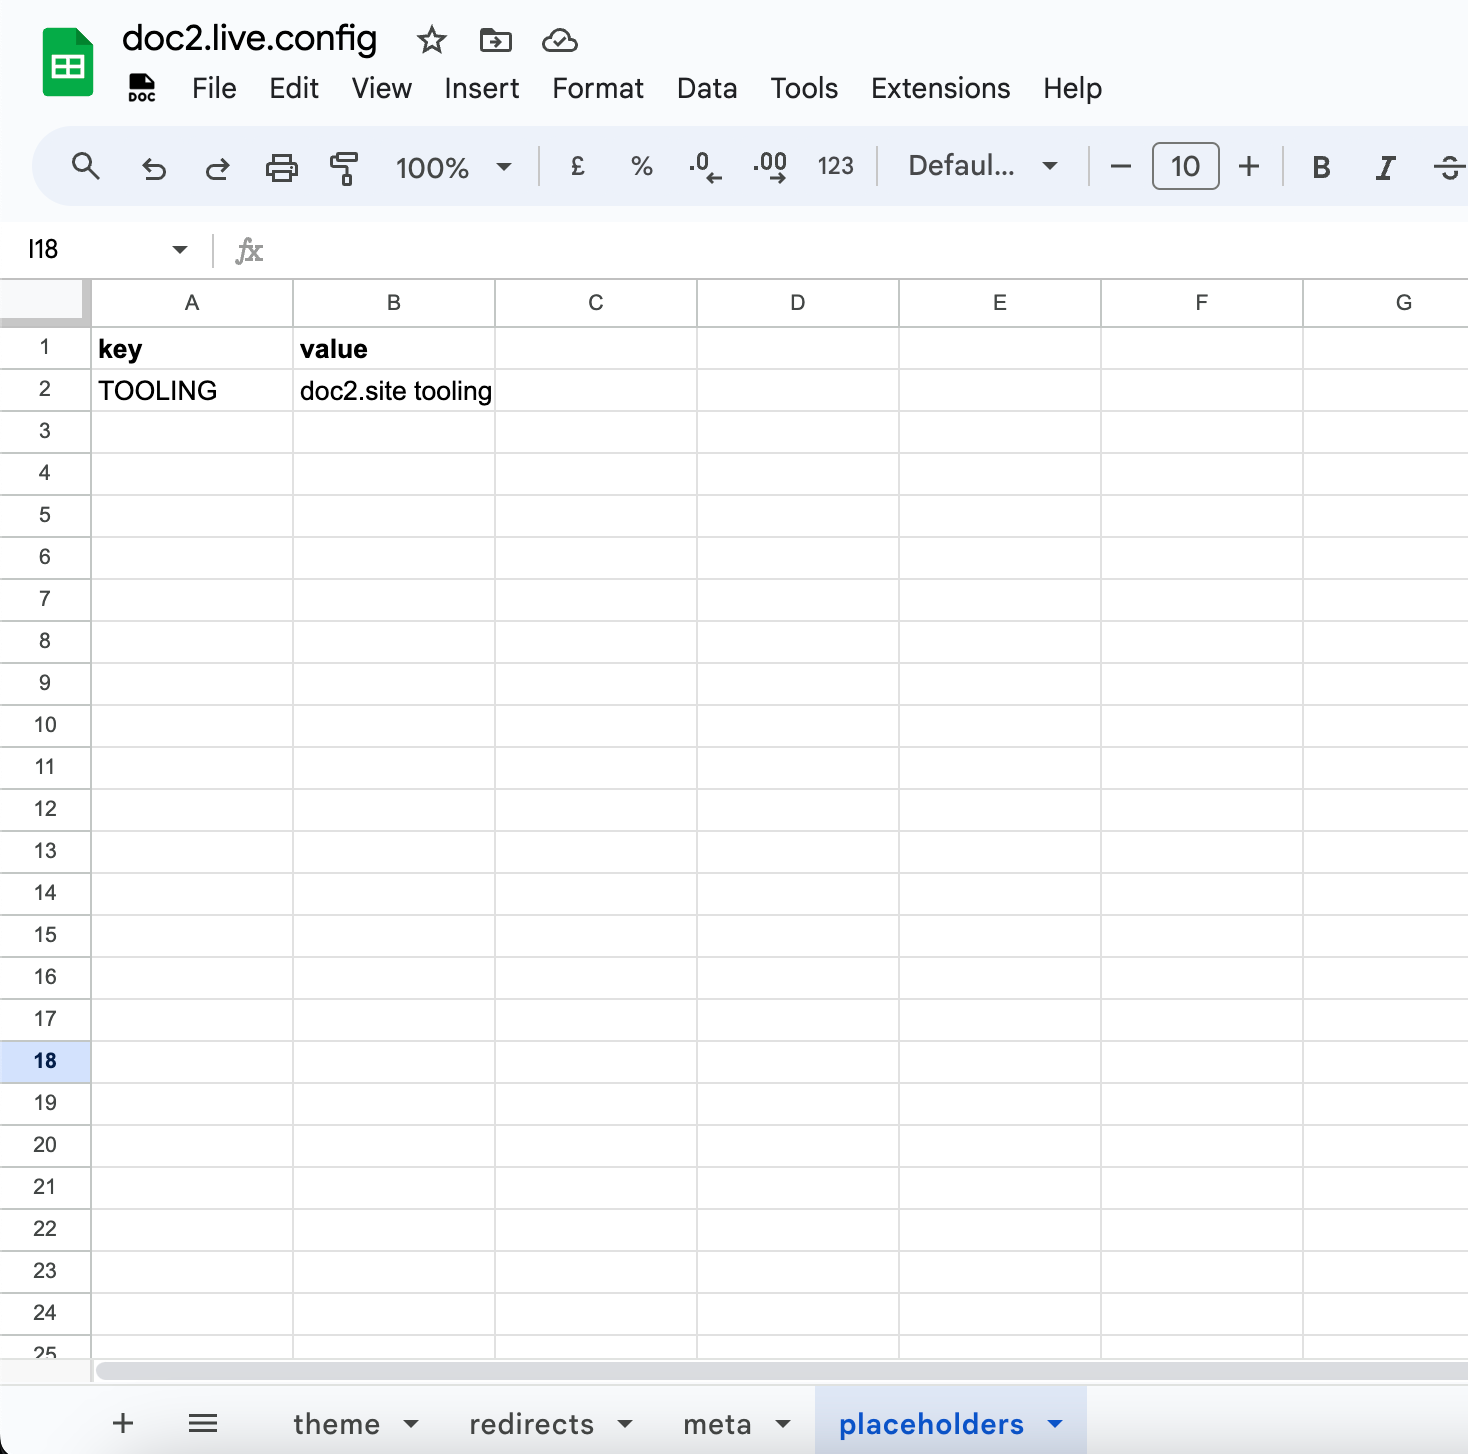
If needed, values for variables can be defined by authors in the doc2.live.config in the placeholder sheet. In the example below, the variable TOOLING will be replaced with the value doc2.site tooling in every published document which contains it.
Robots.txt#
The robots.txt file is automatically generated for subdomains requested on doc2.live and hides all content by default for example https://demo.doc2.live/robots.txt.
A custom robots file can be provided to replace the default generated one. Simply push the custom robots file to the root of the repository to make it available at /robots.txt.
This only works for doc2.live sites behind a custom domain.
Sitemap.xml#
The sitemap file is automatically generated as XML per workspace see https://demo.doc2.live/sitemap.xml for example. The default sitemap uses the published pages information path and publishedAt but excludes the following paths:
/404/fragments/drafts
A custom sitemap can be produced via script using the Search API to replace the default generated one for example to support multi language sites. Simply push the custom sitemap to the root of the repository to make it available at /sitemap.xml.